
So, you want to know how to plant a gardenia? Planting a gardenia is a rewarding experience, bringing exquisite fragrance and beautiful blooms to your garden or home. Can I plant a gardenia in a pot? Yes, gardenias thrive in pots as long as their specific needs for soil, sunlight, and watering are met. Who is a gardenia best suited for? Gardenias are best suited for gardeners who can provide consistent care and attention to their unique requirements.
Gardenias are loved for their intoxicating fragrance and glossy, dark green leaves. These evergreen shrubs, native to Asia, can transform any space into a fragrant oasis. However, they are known for being a bit particular. But with the right approach to planting and ongoing gardenia care, you can enjoy these stunning flowers for years to come. This guide will walk you through every step, from choosing the right spot to keeping your gardenia healthy and happy.
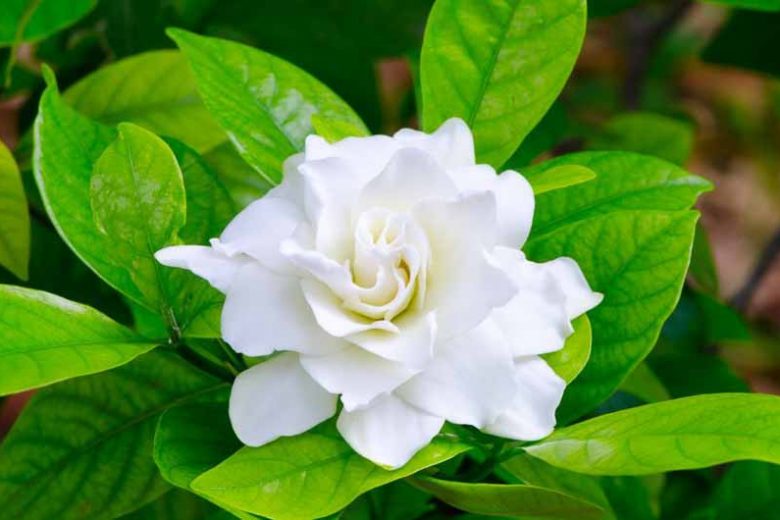
Image Source: www.gardenia.net
Selecting the Perfect Spot: Where Your Gardenia Will Flourish
Choosing the right location is the first crucial step for successful gardenia planting. These plants have specific needs when it comes to their environment.
Gardenia Sunlight Needs: The Right Amount of Rays
Gardenias prefer bright, indirect sunlight. They need about six hours of sunlight daily to bloom prolifically. However, direct, scorching afternoon sun can scorch their delicate leaves, especially in hotter climates.
- Morning Sun: Ideal for gardenias. This provides ample light without the intense heat of the afternoon.
- Dappled Shade: A good option, especially under taller trees that filter the sunlight.
- Avoid: Full, intense afternoon sun. This can lead to leaf burn and stress for the plant.
If you’re planting indoors, a bright window that receives morning sun is perfect. You might need to rotate the plant to ensure even growth.
Gardenia Soil Requirements: The Foundation for Growth
The right gardenia soil is paramount to their success. Gardenias are acid-loving plants. This means they need soil that is well-draining and has a low pH (acidic).
- pH Level: Aim for a soil pH between 5.0 and 6.5.
- Drainage: Poorly draining soil can lead to root rot, a common problem for gardenias.
- Organic Matter: Incorporating plenty of organic matter, such as compost or peat moss, is highly beneficial. This helps retain moisture and nutrients while ensuring good aeration.
What if my soil is not acidic enough? You can amend your soil with elemental sulfur or aluminum sulfate to lower the pH. Peat moss is also an excellent natural acidifier. Test your soil’s pH regularly and adjust as needed.
Preparing for Gardenia Planting: Getting Ready for Success
Before you even think about digging, proper preparation is key. This ensures your new gardenia has the best start possible.
Choosing Your Gardenia Variety: Options for Every Gardener
There are many beautiful gardenia varieties available, each with slightly different characteristics:
- Gardenia jasminoides (Common Gardenia): The classic choice, known for its intensely fragrant, white flowers. Many cultivars exist within this species, like ‘August Beauty’, ‘Frostproof’, and ‘Kleim’s Hardy’.
- ‘August Beauty’: A popular, robust variety with large, double flowers and a long blooming season.
- ‘Frostproof’: As the name suggests, this variety is more tolerant of cold temperatures, making it a good choice for slightly cooler climates. It also has fragrant double blooms.
- ‘Kleim’s Hardy’: A dwarf variety, perfect for smaller spaces or containers. It produces fragrant single flowers.
Consider the mature size of the plant and your climate when selecting a variety.
Gathering Your Planting Supplies
Have everything ready before you start. This makes the gardenia transplanting process smooth and less stressful for the plant.
- Gardenia Plant: Choose a healthy plant with glossy, dark green leaves and no signs of pests or diseases.
- Shovel or Trowel: For digging the planting hole.
- Compost or Peat Moss: To amend the soil.
- Mulch: To help retain moisture and suppress weeds.
- Watering Can or Hose: For immediate watering after planting.
- Gardening Gloves: To protect your hands.
The Art of Gardenia Transplanting: Moving Your Plant
Whether you’re moving a gardenia from a pot to the ground or from one location to another, the technique is similar. Proper gardenia transplanting minimizes shock.
Planting in the Ground
- Dig the Hole: Dig a hole that is twice as wide as the root ball and just as deep. This allows the roots to spread easily.
- Amend the Soil: Mix the soil you removed with compost or peat moss to improve drainage and add acidity.
- Prepare the Plant: Gently remove the gardenia from its nursery pot. If the roots are tightly bound (root-bound), gently loosen them with your fingers or a clean knife. This encourages outward root growth.
- Place the Plant: Set the gardenia in the center of the hole. The top of the root ball should be level with the surrounding soil. Avoid planting it too deep.
- Backfill the Hole: Fill the hole with the amended soil, gently firming it around the root ball to eliminate air pockets.
- Water Thoroughly: Water the plant deeply immediately after planting. This helps settle the soil and reduces transplant shock.
- Mulch: Apply a layer of mulch around the base of the plant, keeping it a few inches away from the stem.
Planting in Containers
- Choose the Right Pot: Select a pot with drainage holes. Gardenias prefer to be slightly snug in their pots, so don’t choose a pot that is too large. A pot that is 2-4 inches wider than the current container is usually sufficient.
- Use Acidic Potting Mix: Use a high-quality potting mix specifically formulated for acid-loving plants, or mix your own using equal parts peat moss, compost, and perlite.
- Prepare the Pot: Place a layer of potting mix at the bottom of the pot.
- Prepare the Plant: Gently remove the gardenia from its nursery pot. If root-bound, loosen the roots as described above.
- Place the Plant: Position the gardenia in the center of the new pot, ensuring the top of the root ball is about an inch below the rim of the pot.
- Fill the Pot: Fill the rest of the pot with the potting mix, firming gently.
- Water Well: Water thoroughly until water drains from the bottom of the pot.
- Mulch (Optional): You can add a thin layer of mulch to the top of the soil in containers as well.
Ongoing Gardenia Care: Keeping Your Plant Thriving
Once planted, consistent gardenia care is essential to ensure your plant produces those coveted fragrant blooms.
Gardenia Watering: The Delicate Balance
Watering is one of the most critical aspects of gardenia care. They like consistently moist soil, but not waterlogged.
- Frequency: Water when the top inch of soil feels dry to the touch. This might be every few days in hot weather or less often in cooler conditions.
- Deep Watering: Water deeply to encourage root growth.
- Avoid Overhead Watering: While it might seem natural, watering the leaves and flowers can promote fungal diseases. Water at the base of the plant.
- Water Quality: Gardenias are sensitive to minerals in tap water, which can cause yellowing leaves. If your tap water is hard, consider using rainwater or distilled water, or letting tap water sit out overnight to allow chlorine to dissipate.
How often should I water my gardenia? This depends heavily on your climate, the size of the plant, and the type of soil. The best rule of thumb is to check the soil moisture.
Gardenia Fertilizer: Feeding for Fragrance and Foliage
Proper gardenia fertilizer provides the nutrients needed for lush foliage and abundant blooms.
- When to Fertilize: Feed your gardenia during the growing season, which typically runs from spring through fall.
- Type of Fertilizer: Use a fertilizer specifically formulated for acid-loving plants, such as those for azaleas, rhododendrons, or camellias. These fertilizers typically have a higher nitrogen content and are lower in phosphorus. Look for formulations that contain iron and magnesium, which are essential for healthy green leaves.
- Application: Follow the instructions on the fertilizer package carefully. Over-fertilizing can damage the plant. It’s often better to under-fertilize than over-fertilize.
- Slow-Release vs. Liquid: Slow-release fertilizers provide a steady supply of nutrients over time, while liquid fertilizers offer a quick boost. You can use a combination or choose what suits you best.
How to fertilize a gardenia? Apply the fertilizer to the soil around the plant, not directly on the leaves or stems. Water thoroughly after fertilizing.
Pruning Gardenias: Shaping and Encouraging Blooms
Gardenia pruning is important for shaping the plant, removing dead or diseased growth, and encouraging more blooms.
- When to Prune: The best time to prune gardenias is immediately after they finish flowering. Pruning too late in the season can remove the buds for the following year’s blooms.
- What to Prune:
- Deadheading: Remove spent flowers to encourage the plant to produce more blooms and to prevent seed formation, which can drain energy.
- Shaping: Trim back branches that are growing too long or out of shape. Aim for a natural, rounded form.
- Remove Dead/Diseased Wood: Cut back any branches that are dead, damaged, or show signs of disease. Make these cuts back to healthy wood.
- Thinning: In mature plants, you can thin out some of the inner branches to improve air circulation and light penetration, which can help prevent gardenia diseases.
How to prune a gardenia? Use clean, sharp pruning shears. For light shaping, you can use your fingers to pinch back new growth.
Mulching: The Protective Layer
Mulch is your gardenia’s best friend. It helps maintain soil moisture, regulate soil temperature, suppress weeds, and gradually adds nutrients as it decomposes.
- Type of Mulch: Organic mulches like pine bark, compost, or shredded leaves are excellent choices.
- Application: Apply a 2-3 inch layer of mulch around the base of the plant, ensuring it doesn’t touch the trunk or stems.
Troubleshooting Common Gardenia Problems
Even with the best care, gardenias can sometimes encounter issues. Knowing how to identify and treat gardenia pests and gardenia diseases is key.
Gardenia Pests
Gardenias can be susceptible to several common garden pests. Early detection and treatment are crucial.
| Pest | Signs of Infestation | Treatment |
|---|---|---|
| Aphids | Small, green, black, or brown insects clustered on new growth; sticky residue. | Blast off with water; use insecticidal soap or neem oil. |
| Mealybugs | White, cottony masses on stems and leaves; sticky honeydew. | Remove with rubbing alcohol-soaked swabs; insecticidal soap or neem oil. |
| Spider Mites | Fine webbing on leaves; stippled or bronzed foliage; tiny red or brown mites. | Increase humidity; use insecticidal soap or neem oil. |
| Scale Insects | Small, immobile bumps on stems and leaves; yellowing leaves; sticky residue. | Scrape off with fingernails; use horticultural oil or insecticidal soap. |
- Prevention: Healthy plants are less susceptible to pests. Ensure proper watering, fertilization, and sunlight. Inspect your plants regularly.
Gardenia Diseases
Gardenia diseases are often related to environmental factors or poor cultural practices.
| Disease | Symptoms | Causes & Prevention |
|---|---|---|
| Root Rot | Yellowing leaves, wilting, stunted growth, mushy roots. | Overwatering, poor drainage. Ensure good drainage and avoid overwatering. |
| Leaf Spot | Brown or black spots on leaves, sometimes with yellow halos. | Fungal infection, often exacerbated by wet foliage. Improve air circulation, avoid overhead watering, and remove infected leaves. |
| Sooty Mold | Black, powdery coating on leaves and stems. | Develops on honeydew produced by sap-sucking insects like aphids or scale. Treat the underlying pest infestation. |
| Chlorosis | Yellowing leaves with green veins (iron deficiency). | Incorrect soil pH (too alkaline). Amend soil with acidifiers and fertilize with iron supplements. |
- Prevention: Good air circulation, proper watering, and appropriate soil pH are the best defenses against gardenia diseases. Remove any fallen leaves or debris from around the plant.
Propagating Gardenias: Sharing the Fragrance
Propagating gardenias is a rewarding way to increase your collection or share these beautiful plants with friends. The most common method is through stem cuttings.
Taking Stem Cuttings
- Timing: The best time to take cuttings is in late spring or early summer, after the main blooming period.
- Selection: Choose healthy, non-flowering stems that are about 4-6 inches long.
- Cutting: Make a clean cut just below a leaf node using sharp, sterilized pruning shears or a knife.
- Prepare the Cutting: Remove the lower leaves from the cutting, leaving only the top few leaves. If the cutting has any flowers or buds, remove them.
- Rooting Hormone (Optional but recommended): Dip the cut end into rooting hormone powder. This can significantly increase the success rate.
- Planting the Cutting: Insert the cut end into a pot filled with a moist rooting medium. A mixture of equal parts peat moss and perlite or sand is ideal.
- Provide Humidity: Cover the pot and cutting loosely with a plastic bag or place it in a propagator. This helps maintain high humidity, which is crucial for successful rooting.
- Location: Place the pot in a warm spot with bright, indirect light. Avoid direct sunlight.
- Watering: Keep the rooting medium consistently moist but not soggy.
- Check for Roots: After 4-8 weeks, you can gently tug on the cutting. If there is resistance, roots have formed.
- Transplanting: Once the cuttings have a good root system, they can be transplanted into their own small pots with a suitable potting mix. Continue gardenia care as usual.
Frequently Asked Questions About Gardenias
Q1: Why are my gardenia leaves turning yellow?
Yellowing leaves (chlorosis) in gardenias are most often caused by a lack of iron, which is usually due to the soil pH being too high (not acidic enough). Ensure your gardenia soil is acidic and consider using a fertilizer that contains iron, or a specific iron supplement. Overwatering or poor drainage can also lead to yellowing leaves.
Q2: My gardenia isn’t blooming. What could be wrong?
Several factors can prevent a gardenia from blooming:
* Insufficient Sunlight: Gardenias need adequate bright light.
* Incorrect Fertilization: Too much nitrogen or not enough phosphorus can inhibit blooming. Use a balanced gardenia fertilizer formulated for acid-loving plants.
* Stress: Extreme temperatures, improper watering, or transplant shock can affect blooming.
* Pruning at the Wrong Time: Pruning after the buds have formed will remove potential flowers.
Q3: How do I overwinter gardenias in colder climates?
In regions where temperatures drop below freezing, gardenias need protection.
* Container-Grown Gardenias: Bring them indoors to a bright, cool location (around 50-60°F or 10-15°C) before the first frost. Reduce watering and stop fertilizing during winter.
* In-Ground Gardenias: In marginal zones, provide winter protection by mulching heavily around the base of the plant and covering the entire shrub with burlap or frost cloth when temperatures are expected to be very low.
Q4: Can I grow gardenias indoors year-round?
Yes, gardenias can be grown indoors year-round, provided you can offer them the right conditions: bright light (preferably a south-facing window), consistent moisture, good humidity, and appropriate gardenia soil. They may require supplemental lighting in winter months.
By following these detailed tips for planting and ongoing gardenia care, you’ll be well on your way to enjoying the unparalleled beauty and fragrance of these cherished plants. Happy gardening!