
Image Source: www.howacarworks.com
How To Test Radiator Cap At Home Easily and Safely
Can you test your radiator cap at home? Yes, you can test your radiator cap at home without specialized tools in many cases, and with a few simple items, you can perform a more thorough radiator cap pressure test. This guide will walk you through the process of checking your radiator cap, identifying faulty radiator cap signs, and what to do next.
The Vital Role of Your Radiator Cap
Your car’s cooling system is a marvel of engineering, working tirelessly to keep your engine at its optimal operating temperature. At the heart of this system lies the radiator cap, a component often overlooked but critically important. The radiator cap function is multifaceted. It’s not just a simple lid; it’s a precisely engineered pressure-relief valve. Its primary job is to maintain the correct pressure within the cooling system. This pressure is crucial because it raises the boiling point of the coolant, allowing the engine to run hotter without boiling over.
A properly functioning radiator cap also prevents coolant from escaping the system, ensuring the right amount of fluid is always available for cooling. When the engine heats up, the coolant expands, and this expansion creates pressure. The radiator cap is designed to hold this pressure up to a specific limit. If the pressure exceeds this limit, the cap opens a small valve, releasing excess pressure and coolant into the overflow reservoir. As the engine cools, the coolant contracts, creating a vacuum. A second valve in the cap then opens, drawing coolant back from the overflow reservoir into the radiator, keeping the system full.
Symptoms of a Faulty Radiator Cap
Recognizing the signs of a malfunctioning radiator cap is key to preventing serious engine damage. Leaky radiator cap symptoms or faulty radiator cap signs can manifest in several ways. One of the most common indicators is overheating and radiator cap issues. If your car’s temperature gauge consistently climbs into the red zone, especially during normal driving conditions or uphill climbs, a faulty cap might be the culprit. This can happen because a cap that doesn’t seal properly or doesn’t hold pressure will allow the coolant to boil at a lower temperature, leading to overheating.
Another sign is coolant leaks. You might notice puddles of coolant under your car, particularly after it has been running. If the radiator cap isn’t sealing tightly, hot coolant can be forced out past the seal, leading to visible leaks. You might also see steam coming from under the hood, especially when the engine is hot. This is often a sign of pressurized, superheated coolant escaping the system.
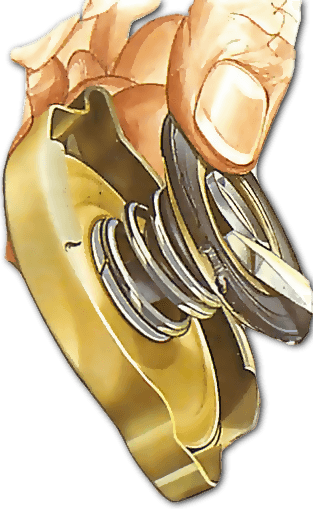
Sometimes, you might hear a hissing sound when the engine is hot, which could be steam or coolant escaping from a compromised radiator cap. A visual inspection can also reveal problems. Look for a damaged or corroded spring on the underside of the cap, or a cracked or brittle rubber seal. The lifespan of a radiator cap is not infinite, and over time, the springs can weaken, and the rubber seals can degrade, losing their ability to hold pressure effectively.
Simple Home Radiator Cap Inspection
Before diving into a radiator cap pressure test, a basic visual radiator cap inspection can tell you a lot. This is something you can do yourself with no special tools.
What to Look For During Inspection:
- The Seal: Examine the rubber seal around the edge of the cap. It should be pliable and free of cracks, tears, or hardening. If it looks brittle, dried out, or has any visible damage, the cap is likely compromised.
- The Spring: Look at the spring mechanism on the underside of the cap. It should be clean and free of rust or corrosion. If the spring looks weak or damaged, it may not be able to maintain the correct pressure.
- The Body: Check the metal or plastic body of the cap for any signs of damage, such as cracks or dents.
- The Mounting Surface: Inspect the surface where the cap seals onto the radiator neck. It should be clean and free of debris or corrosion that could prevent a proper seal.
Steps for Visual Inspection:
- Ensure the Engine is Cool: This is the most critical safety step. Never attempt to remove the radiator cap when the engine is hot. The cooling system is under pressure, and removing the cap can cause a geyser of scalding coolant, leading to severe burns. Wait at least an hour or two after the engine has been turned off, or until it is completely cool to the touch.
- Locate the Radiator Cap: The radiator cap is usually found at the top of the radiator, a large, often circular metal component in front of the engine. In some vehicles, the pressure cap might be located on a coolant reservoir or a metal pipe connected to the radiator. Consult your owner’s manual if you’re unsure.
- Remove the Cap Carefully: Place a thick rag or shop towel over the cap to protect your hand. Turn the cap counter-clockwise about a quarter turn until you feel it engage with the spring. You should hear a slight hiss as any residual pressure is released. Once the hissing stops, continue turning counter-clockwise and lift the cap straight up.
- Inspect the Cap: Follow the “What to Look For” points above. Pay close attention to the rubber gasket and the spring.
- Inspect the Radiator Neck: While the cap is off, look at the neck of the radiator where the cap seals. Ensure it’s clean and doesn’t have any nicks, cracks, or debris that could prevent a good seal.
If your visual inspection reveals any of these issues, it’s a strong indicator that you need a radiator cap replacement.
Performing a Radiator Cap Pressure Test at Home
While a visual inspection is a good start, it doesn’t tell you if the cap is holding the correct pressure. A radiator cap pressure test is the definitive way to check its integrity. You can perform this test using a specialized tool, or with a bit of ingenuity, you can infer its performance.
Method 1: Using a Radiator Cap Pressure Tester Tool
This is the most accurate and recommended method. Radiator cap pressure testers are relatively inexpensive and can be purchased at most auto parts stores or online. They are designed specifically for this task.
What You’ll Need:
- Radiator Cap Pressure Tester Kit
- Shop Rags
- Gloves (optional, but recommended for safety)
- Eye Protection (recommended)
Steps for Using a Pressure Tester:
- Ensure the Engine is Cool: Again, safety first! The engine must be completely cool before you begin.
- Remove the Old Radiator Cap: Follow the steps outlined in the visual inspection section.
- Select the Correct Adapter: The pressure tester kit comes with various adapters. You need to find the one that fits snugly onto your radiator neck or reservoir opening. Most kits include an adapter specifically for radiator caps.
- Attach the Tester: Securely attach the chosen adapter to the radiator neck. Then, connect the pressure gauge and pump assembly to the adapter.
- Pump Up the Pressure: Slowly pump the handle on the tester. Watch the pressure gauge. Your car’s owner’s manual or a repair manual will specify the correct pressure rating for your radiator cap (usually indicated on the cap itself, like 13 PSI or 16 PSI).
- Monitor for Leaks or Pressure Drop: Pump the tester up to the cap’s rated pressure and hold it there for a minute or two.
- If the pressure holds steady and you don’t see any leaks from the cap or the radiator neck, the cap is likely functioning correctly.
- If the pressure drops steadily without any visible leaks, it indicates the cap is not holding pressure, and you need a radiator cap replacement.
- If you see coolant leaking from around the cap or radiator neck while testing, it means the seal is compromised, and the cap needs replacing.
- Release Pressure and Remove Tester: Once the test is complete, slowly release the pressure using the relief valve on the tester before removing the adapter.
- Reinstall the Old Cap (Temporarily) or New Cap: If the old cap passed, you can put it back on. If it failed, install a new, correct-spec radiator cap immediately.
Method 2: Inferring Radiator Cap Performance (Less Precise)
This method doesn’t involve precise measurement but can help you identify a likely faulty cap if other symptoms are present.
What You’ll Need:
- Thick Rags
- Gloves
- Eye Protection
- A clean, level surface to park your car on.
Steps for Inferring Performance:
- Ensure the Engine is Cool: As always, start with a cold engine.
- Remove the Radiator Cap: Carefully remove the cap as described earlier.
- Inspect the Cap: Perform the thorough visual inspection as detailed previously, looking for any signs of wear or damage.
- Observe Coolant Level: When the engine is cold, the coolant level should be at or near the “COLD” fill line on the overflow reservoir or within the radiator itself if it has no reservoir.
- Start the Engine and Observe: Start the engine and let it idle. As it warms up, watch the coolant in the radiator neck (if visible).
- Normal Operation: You should see the coolant circulating. As the engine reaches operating temperature, the coolant might expand slightly, and you might hear the thermostat open, causing a slight increase in circulation. The pressure within the system should build, but the cap should keep it contained.
- Suspect Operation: If you notice coolant bubbling vigorously in the radiator neck even before the engine reaches full operating temperature, or if you see coolant being pushed out into the overflow tank prematurely, it could indicate the cap isn’t holding pressure correctly. Also, if the coolant level in the radiator drops significantly after the engine has cooled down, it might suggest the cap isn’t creating the necessary vacuum to draw coolant back from the overflow.
- Check for Leaks: While the engine is running and warming up, look for any signs of coolant leaking from the radiator cap area or hoses.
This method is less scientific but can provide clues. If you notice any of these warning signs, it strongly suggests a radiator cap replacement is in order.
When to Consider Radiator Cap Replacement
Your radiator cap has a finite radiator cap lifespan. Typically, they should be replaced every 30,000 to 50,000 miles, or every 2 to 5 years, whichever comes first. However, if you experience any of the leaky radiator cap symptoms or faulty radiator cap signs mentioned earlier, or if your pressure test indicates it’s not holding pressure, you should replace it sooner.
Factors Affecting Radiator Cap Lifespan:
- Coolant Quality: Using the correct type and quality of coolant can help protect the cap’s rubber seals.
- Operating Conditions: Vehicles driven in extreme temperatures or under heavy load may experience more stress on the cooling system components, potentially shortening the cap’s lifespan.
- Maintenance History: Regular cooling system flushes and inspections can help catch problems early.
How to Replace a Radiator Cap
Radiator cap replacement is one of the simpler DIY car maintenance tasks.
What You’ll Need:
- New Radiator Cap (ensure it’s the correct pressure rating and size for your vehicle – check your owner’s manual or the old cap)
- Shop Rags
- Gloves
- Eye Protection
Steps for Replacement:
- Ensure the Engine is Cool: Absolutely critical for safety.
- Remove the Old Cap: Follow the removal steps mentioned earlier.
- Clean the Radiator Neck: Use a clean rag to wipe down the radiator neck where the cap seals. Ensure it’s free of dirt, debris, and corrosion.
- Install the New Cap: Take your new radiator cap. Align it with the radiator neck and press down firmly. Turn it clockwise until it clicks or feels securely seated. You should feel it lock into place.
- Dispose of Old Cap: Properly dispose of the old radiator cap.
The Importance of a Secure Radiator Cap Seal
The checking radiator cap seal is paramount to the entire operation of your cooling system. A weak or compromised seal means the system cannot maintain the required pressure. This leads to a cascade of problems. When the system can’t hold pressure, the coolant’s boiling point drops. This means the coolant can start to boil at much lower temperatures than it should, even during normal operation. Boiling coolant creates steam pockets, which are much less efficient at transferring heat than liquid coolant. This localized overheating can damage engine components like cylinder heads and gaskets.
Furthermore, a faulty seal prevents the vacuum valve from working correctly. When the engine cools, the coolant contracts, creating a vacuum. The vacuum valve in the radiator cap is designed to open and allow coolant from the overflow reservoir to be drawn back into the radiator, keeping the system full. If the seal is bad, this vacuum might not be created properly, or air might be drawn in, leading to air pockets in the system, which further impair cooling efficiency. Air pockets are notorious for causing localized hot spots and can even lead to complete cooling system failure if not addressed.
Troubleshooting Overheating and Radiator Cap Issues
If your car is overheating and radiator cap problems are suspected, it’s important to diagnose systematically.
- Confirm Overheating: Ensure your temperature gauge is indeed reading high, or you’re experiencing actual symptoms like steam or a “hot engine” warning light.
- Check Coolant Level: A low coolant level can cause overheating, irrespective of the cap. Top up the coolant if necessary and check for leaks.
- Inspect the Radiator Cap: Perform a thorough visual inspection as described.
- Pressure Test: If the visual inspection is inconclusive or if you suspect the cap, perform a radiator cap pressure test.
- Check Other Components: If the radiator cap appears to be in good condition and holds pressure, the overheating issue might be elsewhere. This could include a faulty thermostat, a clogged radiator, a malfunctioning water pump, or a worn radiator fan.
Radiator Cap Pressure Test Results: What They Mean
Interpreting the results of your radiator cap pressure test is crucial for deciding on the next steps.
| Test Result | Possible Cause | Recommended Action |
|---|---|---|
| Pressure holds steady at rated PSI | Radiator cap is likely functioning correctly. | Monitor the system. Consider other potential causes of issues. |
| Pressure drops steadily | Radiator cap is not holding pressure (weak spring or seal). | Replace the radiator cap. |
| Coolant leaks from cap/neck | Poor seal on the radiator cap or radiator neck. | Replace the radiator cap. Inspect radiator neck for damage. |
| Cap fails to seal on tester | Damaged cap or incorrect adapter used. | Try a different adapter. If still failing, replace the cap. |
Frequently Asked Questions (FAQ)
-
Q1: How often should I replace my radiator cap?
A: It’s generally recommended to replace your radiator cap every 30,000-50,000 miles or every 2-5 years, as part of routine cooling system maintenance. However, if you notice any faulty radiator cap signs, replace it sooner. -
Q2: Can a bad radiator cap cause my car to overheat?
A: Yes, a bad radiator cap is a common cause of engine overheating. It fails to maintain the necessary pressure in the cooling system, which lowers the boiling point of the coolant. -
Q3: Do I need a special tool to test my radiator cap?
A: While a visual inspection can reveal some problems, a radiator cap pressure test using a dedicated tool provides the most accurate diagnosis. These tools are affordable and available at auto parts stores. -
Q4: Is it safe to remove the radiator cap when the engine is hot?
A: Absolutely not. The cooling system is under high pressure when hot, and removing the cap can result in a forceful spray of scalding coolant, causing severe burns. Always wait for the engine to cool completely. -
Q5: What is the typical pressure rating for a radiator cap?
A: Radiator cap pressure ratings vary by vehicle, but common ratings are between 13 PSI and 16 PSI. Check your owner’s manual or the old cap itself for the correct specification.
By following these steps, you can effectively test your radiator cap at home, ensuring your vehicle’s cooling system operates efficiently and preventing potentially costly engine damage. Regular inspection and timely radiator cap replacement are simple yet vital maintenance tasks.