
So, how many boxes do you need to pack a kitchen? The answer is: it varies, but most standard kitchens need between 10 to 20 medium-sized boxes, plus specialty boxes for fragile items and appliances. This guide will help you figure out exactly how many kitchen moving boxes you’ll require and how to tackle your kitchen move planning effectively.
Moving can feel like a mountain to climb, and the kitchen often presents the biggest challenge. It’s packed with a variety of items, from delicate glassware to heavy pots and pans. Knowing how much to pack your kitchen and having the right kitchen packing supplies on hand is crucial for a smooth transition. This article aims to provide you with the ultimate answer and a comprehensive strategy for packing your kitchen, ensuring your moving day is less stressful and more organized.
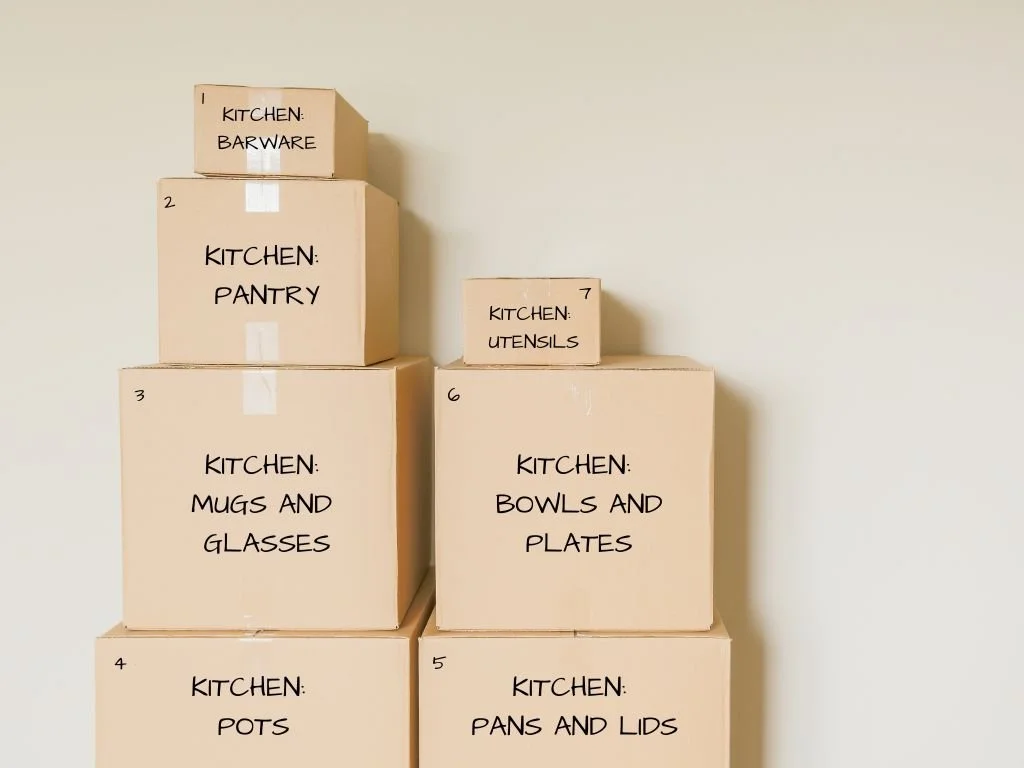
Image Source: images.squarespace-cdn.com
Deciphering Your Kitchen’s Packing Needs
Before you start grabbing boxes, take a thorough walk through your kitchen. This is the first step in estimating moving boxes. Look at what you have and consider how much to pack your kitchen.
What You’ll Find in Your Kitchen
Your kitchen is a treasure trove of diverse items:
- Dishware: Plates, bowls, cups, mugs, saucers.
- Glassware: Wine glasses, tumblers, specialty glasses.
- Cookware: Pots, pans, baking sheets, casserole dishes.
- Utensils: Spatulas, whisks, ladles, knives, forks, spoons.
- Appliances: Toaster, blender, coffee maker, microwave, stand mixer.
- Linens: Dish towels, oven mitts, placemats.
- Pantry Items: Canned goods, dry goods, spices, oils.
- Cleaning Supplies: Soaps, sponges, sprays.
- Decorative Items: Vases, canisters, small sculptures.
- Small Electronics: Food processor, electric kettle.
Factors Influencing Kitchen Box Quantity
The kitchen box quantity isn’t a one-size-fits-all figure. Several factors will impact your needs:
- Kitchen Size: A large gourmet kitchen will naturally require more boxes than a compact galley kitchen.
- Number of Occupants: A family of five will have more dishes and cookware than a single person.
- Amount of Kitchenware: Do you love to cook and entertain? Do you have many specialty gadgets? This all adds up.
- Fragility of Items: If you have a lot of fine china or delicate glassware, you’ll need more padding and specialized boxes.
- Appliance Size and Quantity: Bulky appliances like stand mixers or food processors might need their own boxes or specialized packing.
- Pantry Inventory: A well-stocked pantry means more items to pack.
Strategic Kitchen Packing: A Step-by-Step Approach
A good kitchen packing strategy is key. It’s not just about stuffing things into boxes; it’s about protecting your belongings and making unpacking easier.
Gathering Your Kitchen Packing Supplies
Having the right kitchen packing supplies is non-negotiable. You’ll need more than just boxes.
Essential Kitchen Packing Supplies:
- Moving Boxes:
- Small Boxes (16x12x12 inches): Best for small, heavy items like spices, canned goods, small appliances, and toiletries if you’re packing other rooms too.
- Medium Boxes (18x18x16 inches): The workhorse for most kitchen items – dishes, pots, pans, small appliances.
- Large Boxes (20x20x20 inches): Useful for lighter, bulkier items like linens, large pots, or some appliances.
- Dish Packs/Barrel Packs (Extra large, padded): Specifically designed for fragile dishware and glassware, offering superior protection.
- Wardrobe Boxes: Can be surprisingly useful for storing long kitchen utensils vertically or for lighter, awkwardly shaped items.
- Packing Tape: Strong, high-quality packing tape is essential to secure your boxes.
- Bubble Wrap: For cushioning fragile items like glassware and delicate dishes.
- Packing Paper/Newsprint: Use this for wrapping individual items, filling voids, and separating layers of dishes.
- Markers: For labeling boxes clearly.
- Box Cutter/Scissors: For opening and closing boxes.
- Stretch Wrap: Can be helpful for securing drawers or covering items like large pots.
- Linens (Towels, Blankets): Can double as padding for heavier items or to fill empty spaces in boxes.
The Kitchen Packing Process: From Cabinets to Counters
Here’s how to break down packing your kitchen effectively:
Step 1: Declutter and Purge
Before you pack a single item, declutter! Go through your cabinets and drawers.
- Discard: Toss out anything that’s broken, expired, or you haven’t used in years.
- Donate: Give away items in good condition that you no longer need.
- Sell: Higher-value items you don’t want can be sold.
Fathoming What to Keep:
- Examine expiration dates: Especially on spices, oils, and canned goods.
- Check for damage: Cracked mugs, chipped plates, worn-out utensils.
- Consider usage: If you haven’t used a specialty gadget in over a year, it might be time to let it go.
Step 2: Gather Your Kitchen Moving Boxes and Supplies
Once you know what you’re keeping, it’s time to get your kitchen packing supplies ready. Refer back to the list of essentials. It’s better to have a few extra boxes than to run out midway through packing.
Step 3: Pack Items by Category
This is a crucial kitchen packing tip for organization. Group similar items together.
- Dishes and Glassware: This is where dish packs and plenty of padding are vital.
- Pots and Pans: Pack these in medium or large boxes.
- Utensils and Gadgets: Small boxes are ideal for these.
- Small Appliances: Pack each one individually.
- Linens: Pack these in large boxes, possibly with some padding.
- Pantry Items: Use small or medium boxes.
Step 4: Pack Cabinets and Drawers Methodically
Packing kitchen cabinets requires careful attention.
Packing Dishware and Glassware
This is often the most delicate part of packing your kitchen essentials.
- Wrap Individually: Wrap each plate, bowl, and glass in packing paper or bubble wrap.
- Stack Plates: Stack plates vertically in a dish pack, with plenty of cushioning on the bottom, between layers, and on top. Never stack them flat horizontally.
- Glassware: Place glasses upright in boxes, with packing paper or bubble wrap filling the inside and outside. Fill any empty space in the box.
- Use Dish Packs: These boxes have dividers and are reinforced for maximum protection.
- Label Clearly: Mark these boxes as “FRAGILE” and “KITCHEN DISHES.”
Packing Pots and Pans
- Nest Them: Nest pots and pans inside each other to save space. Place packing paper between them to prevent scratching.
- Lids Separately: Pack lids flat or wrap them individually and place them in boxes with other items.
- Heavy Items: Place heavier pots and pans in smaller, sturdy boxes to make them manageable.
Packing Utensils and Gadgets
- Drawer by Drawer: Keep utensils from the same drawer together.
- Utensil Holders: If you have utensil holders, you can wrap the whole thing with packing paper and tape.
- Small Appliances: For items like graters or can openers, place them in small boxes with plenty of padding.
Packing Small Appliances
- Original Packaging: If you still have the original boxes, use them!
- Wrap Securely: If not, wrap each appliance individually in bubble wrap.
- Fill Voids: Pack them snugly in boxes with extra padding to prevent shifting.
- Consider Weight: Heavy appliances should go in smaller boxes.
Packing Pantry Items
- Group by Type: Group canned goods together, dry goods together, etc.
- Use Small Boxes: Small boxes are best for canned and jarred goods, as they can become very heavy.
- Secure Jars: Ensure lids are tight. You can place a piece of packing paper over the opening before screwing on the lid for extra security.
- Spices: Group spice jars together in a small box.
Packing Linens and Towels
- Large Boxes: Use large boxes for dish towels, oven mitts, and placemats.
- Padding: These can also serve as excellent padding for other items.
Step 5: Load Boxes Strategically
When packing boxes, consider how they will be loaded onto the moving truck.
- Heavy Items in Small Boxes: Makes them easier to lift and carry.
- Lighter Items in Larger Boxes: For bulkier but lighter items.
- Fill Empty Space: Use packing paper, towels, or linens to fill any voids. This prevents items from shifting and breaking during transit.
- Don’t Overpack: Boxes should be full but not bulging. They should be easy to close and lift.
Labeling: Your Unpacking Lifesaver
Clear labeling is a critical part of your kitchen packing strategy.
Labeling Guidelines:
- Contents: Briefly list what’s inside (e.g., “Kitchen – Plates & Bowls,” “Kitchen – Pots & Pans,” “Kitchen – Spices”).
- Fragile: Mark any box containing breakable items with “FRAGILE” on multiple sides.
- Destination Room: Indicate which room the box belongs in at your new home (e.g., “Kitchen”).
- Heavy: If a box contains particularly heavy items, mark it as “HEAVY” to warn movers.
Estimating Moving Boxes for Your Kitchen
While there’s no exact formula, we can provide a solid estimate based on typical kitchen contents. This is for estimating moving boxes for a standard kitchen.
| Item Category | Box Size | Estimated Number of Boxes | Notes |
|---|---|---|---|
| Dishware & Glassware | Dish Pack/Small | 3-5 | Requires significant padding and specialized boxes for fragile items. |
| Pots & Pans | Medium/Large | 2-4 | Can nest; consider separate boxes for bulky or irregular items. |
| Small Appliances | Small/Medium | 2-3 | Wrap individually; include toaster, blender, coffee maker, etc. |
| Utensils & Gadgets | Small | 2-3 | Keep similar items together; can fit many in one box if well-organized. |
| Pantry Items (Cans) | Small | 2-4 | Heavy; keep boxes manageable in size. |
| Pantry Items (Dry Goods) | Medium | 1-2 | Cereal boxes, pasta, etc. |
| Linens & Towels | Large | 1-2 | Can also be used as padding. |
| Cleaning Supplies | Small | 1 | Ensure liquids are tightly sealed and upright. |
| Decorative Items | Small/Medium | 1-2 | Varies greatly depending on personal items. |
Total Estimated Boxes for a Standard Kitchen: 15 – 26 Boxes
Important Considerations for Your Kitchen Box Quantity:
- Large Kitchens/Gourmet Cooks: Add 5-10 more boxes.
- Minimalist Kitchens: You might get away with 8-12 boxes.
- Fine China/Crystal: Increase dish pack quantity and add extra padding.
- Bulk Cooking: If you buy in bulk, you’ll need more pantry boxes.
Packing Kitchen Essentials: Beyond the Boxes
While boxes are primary, other kitchen moving essentials are important for the actual move day and immediate unpacking.
Moving Day Kitchen Essentials
- “Open First” Box: Pack a box with immediate necessities for your new kitchen. This could include:
- Coffee maker and coffee
- A few mugs and plates
- Basic cutlery
- A knife and cutting board
- Dish soap and a sponge
- Trash bags
- Paper towels
- A basic set of cooking utensils (spatula, spoon)
- A small pot for heating water
- Snacks and water bottles
- Toolkit: For assembling furniture or making minor repairs.
- Cleaning Supplies: Basic cleaning supplies for the new kitchen.
- Phone Chargers: Essential for staying connected.
Packing Kitchen Cabinets: Tips for Efficiency
When packing kitchen cabinets, efficiency and protection go hand-in-hand.
- Empty and Clean: Before packing items from cabinets, empty them completely and give them a quick wipe-down.
- Don’t Pack Drawers Separately: For items in drawers like utensils or cutlery, it’s often easier to pack them in their existing organizers or wrap the entire organizer. However, heavy drawers can become too cumbersome. If they are heavy, empty them.
- Secure Doors: Use packing tape or painter’s tape to secure cabinet doors and drawers shut. Painter’s tape is often preferred as it’s less likely to leave residue.
- Protect Shelves: If you’re moving cabinets without removing items (not recommended, but if necessary for a very short move), consider covering shelves with blankets.
Frequently Asked Questions About Kitchen Moves
Q: How do I pack my knives?
A: Knives are sharp and dangerous. Wrap each knife individually in several layers of packing paper, making sure the blade is fully covered. Then, secure the paper with tape. For extra safety, place the wrapped knives in a sturdy box and label it clearly. You can also use cardboard sleeves or knife guards if you have them.
Q: What about my spices?
A: Spices can be packed in small, sturdy boxes. Group them together. Ensure lids are tightly closed. If you’re concerned about leakage, you can place a small piece of plastic wrap over the opening before screwing the lid back on. Place these boxes towards the top of a stack to prevent crushing.
Q: Can I use suitcases for kitchen items?
A: Yes, suitcases can be used for lighter kitchen items like linens, small appliances that fit, or pantry items that aren’t too heavy. However, avoid packing heavy items like dishes or canned goods in suitcases, as they can be difficult to manage and the luggage might not withstand the weight.
Q: Should I pack my microwave?
A: Yes, pack your microwave. If you have the original box, use it. Otherwise, wrap it securely in bubble wrap and place it in a sturdy box that fits it well. Ensure there’s no food residue inside before packing.
Q: How do I pack my refrigerator or freezer?
A: Empty, defrost, and clean your refrigerator and freezer thoroughly. Ensure they are completely dry to prevent mold. You can secure the doors with tape or bungee cords. For moving, they are typically moved on their own or with specialized equipment. Some people may want to pack loose shelves or drawers separately in boxes.
By following these guidelines, you can confidently tackle your kitchen move, ensuring your valuable and everyday kitchen essentials arrive safely at your new home. Happy packing!