
Can you grow hops at home? Yes, absolutely! Growing hops at home is a rewarding endeavor for many gardeners and homebrewers. This guide will walk you through everything you need to know about successful hop cultivation.
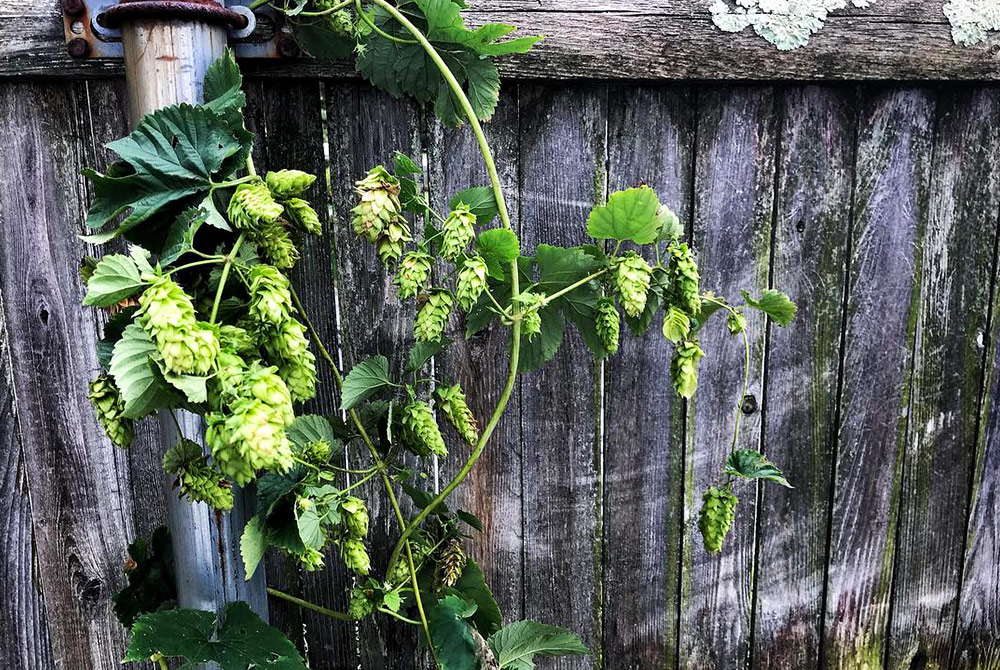
Image Source: www.hopculture.com
Getting Started: The Basics of Hop Planting
Starting your hop growing journey involves a few key steps. First, you’ll need to acquire hop rhizomes or hop plants. Rhizomes are the root systems of mature hop plants, while plants are young, potted versions. Both are excellent ways to begin your hop planting.
Choosing the Best Hops to Grow
The world of hops is vast, with many different hop varieties to choose from, each offering unique characteristics for brewing and aroma. When selecting best hops to grow, consider your goals. Are you aiming for a classic bittering hop, an aromatic hop for late additions, or a dual-purpose hop?
Here are some popular hop varieties to consider:
- Cascade: A highly aromatic American variety known for its floral, citrusy notes. It’s a great dual-purpose hop.
- Centennial: Often called “Super Cascade,” it offers a strong grapefruit aroma with floral undertones. Another excellent dual-purpose hop.
- Chinook: A robust hop with piney and spicy characteristics, good for bittering and aroma.
- East Kent Goldings: A classic English aroma hop, producing a refined, earthy, and floral flavor.
- Fuggle: Another traditional English hop, known for its earthy, grassy, and slightly minty aroma.
- Magnum: A high-alpha acid hop, primarily used for bittering but also contributes some spicy notes.
- Mosaic: A newer American variety that boasts complex tropical fruit, berry, and citrus flavors.
Site Selection: Where Your Hops Will Thrive
Hops are vigorous climbers and require plenty of sunlight. For optimal hop cultivation, choose a location that receives at least six to eight hours of direct sunlight per day. They also need well-drained soil. Avoid areas where water tends to puddle after rain.
Soil Preparation: Creating the Perfect Environment
Hops prefer rich, loamy soil with a pH between 6.0 and 7.0. Before planting, amend your soil with compost or aged manure. This provides essential nutrients and improves drainage. Loosen the soil to a depth of at least 12 inches.
Planting Your Hops: From Rhizomes to Bines
Whether you’re starting with hop rhizomes or young plants, proper planting techniques are crucial for healthy growth.
Planting Hop Rhizomes
Rhizomes are typically planted in early spring, as soon as the ground can be worked and the danger of hard frost has passed.
- Digging the Hole: Dig a hole about 4-6 inches deep and wide enough to spread the rhizome’s roots.
- Placing the Rhizome: Place the rhizome in the hole with the “eyes” or buds pointing upwards. If you have a large rhizome with multiple buds, you can cut it into sections, ensuring each section has at least one or two buds and some root.
- Backfilling: Cover the rhizome with about 2-3 inches of soil. Do not pack the soil down tightly; keep it loose.
- Watering: Water the area gently.
- Initial Growth: You may not see much growth for a few weeks, which is perfectly normal. Hops develop an extensive root system before their above-ground growth appears.
Planting Hop Plants
If you’ve purchased potted hop plants, the process is similar to transplanting other garden plants.
- Digging the Hole: Dig a hole twice as wide and as deep as the plant’s root ball.
- Removing from Pot: Gently remove the plant from its container. If the roots are tightly bound, gently loosen them.
- Placing the Plant: Place the plant in the hole so the top of the root ball is level with the surrounding soil.
- Backfilling and Watering: Fill the hole with soil, gently firm it around the base of the plant, and water thoroughly.
Providing Support: The Vertical Life of Hop Bines
Hops are vigorous climbers, sending up tall hop bines that can reach 15-25 feet or even more in a single season. They need sturdy support systems.
Building a Hop Trellis
The most common method for supporting hop bines is a trellis. This can range from simple poles to elaborate structures.
- Pole and String System: This is a popular and effective method for DIY hop growing. You’ll need sturdy poles (wood, metal, or PVC) at least 15-25 feet tall. Drive them securely into the ground. Attach strong rope or twine to the top of each pole, allowing it to hang down to the base. The hop bines will naturally climb these strings.
- Arbor or Pergola: A more permanent structure like an arbor or pergola can also serve as a support system, especially if you have the space and desire for a more aesthetically pleasing setup.
- Wire and Post System: For larger plantings, a system of tall posts with wires strung between them at various heights can provide ample support for multiple hop bines.
Training the Bines
In their first year, you might see one or two strong shoots emerge from your rhizome. You’ll need to gently train these shoots to climb your support structure. You can tie them loosely to the strings or poles to encourage upward growth. As the season progresses, the hop bines will twist and climb on their own.
Watering and Fertilizing: Feeding Your Hops
Proper watering and feeding are essential for robust hop growth and abundant cone production.
Watering Needs
Hops need consistent moisture, especially during their active growing season.
- First Year: Focus on deep watering to encourage strong root development. Water thoroughly once or twice a week, depending on rainfall and soil type.
- Established Plants: Mature plants are more drought-tolerant but still benefit from consistent watering, particularly during dry spells and when the cones are developing. Aim for about one inch of water per week.
- Mulching: Applying a layer of mulch around the base of your hop plants helps retain soil moisture, suppress weeds, and regulate soil temperature.
Fertilization Schedule
Hops are heavy feeders. A balanced fertilizer is recommended.
- Early Spring: Apply a balanced fertilizer (e.g., 10-10-10) when new growth begins to emerge.
- Mid-Season: A second feeding around flowering time can be beneficial, especially for nitrogen, to support vegetative growth. However, avoid excessive nitrogen late in the season, as it can reduce cone quality.
- Compost: Top-dressing with compost annually is also an excellent way to provide slow-release nutrients.
Dealing with Pests and Diseases
While generally hardy, hop plants can be susceptible to certain pests and diseases. Vigilance is key to successful home brewing hops production.
Common Pests
- Aphids: These small, sap-sucking insects can infest new growth and the undersides of leaves. They can be controlled with insecticidal soap, neem oil, or by introducing beneficial insects like ladybugs.
- Spider Mites: Tiny mites that spin fine webs on the undersides of leaves, causing stippling and discoloration. They thrive in dry conditions. Regular watering and misting can help deter them, as can insecticidal soap or horticultural oil.
- Japanese Beetles: These iridescent beetles can chew holes in leaves and flowers. Handpicking them off the plants and dropping them into soapy water is an effective method.
- Hop Aphids: A specific type of aphid that can cluster on the developing cones, reducing their quality.
Common Diseases
- Powdery Mildew: A fungal disease that appears as white, powdery patches on leaves and stems. Good air circulation, avoiding overhead watering, and using a fungicide can help manage it.
- Downy Mildew: Another fungal disease that causes yellowing spots on leaves, which eventually turn brown and necrotic. It often manifests as fuzzy growth on the underside of leaves. Prevention is key, including good air circulation and avoiding wet foliage.
- Mosaic Viruses: These viruses can cause stunted growth, leaf distortion, and reduced cone yield. They are often spread by aphids. Planting disease-resistant varieties and removing infected plants are the best defenses.
Growing Hops Indoors: A Challenging but Possible Feat
While hops are traditionally grown outdoors due to their size and light requirements, growing hops indoors is possible, though it presents unique challenges.
Requirements for Indoor Growing
- Light: This is the biggest hurdle. Hops need intense light. You’ll need powerful grow lights (LED or high-pressure sodium) specifically designed for fruiting plants. They will need 12-16 hours of light per day.
- Space: Hops grow tall. Even indoors, you’ll need significant vertical space. A grow tent with a robust support system is often necessary.
- Potting Mix and Pots: Use a well-draining potting mix. Large containers (at least 5-10 gallons) are required to accommodate the extensive root system.
- Watering and Feeding: Indoor plants will dry out more quickly. Monitor soil moisture closely and fertilize regularly with a balanced liquid fertilizer.
- Air Circulation: Good airflow is essential to prevent fungal diseases. Use fans to ensure constant air movement.
- Support: Even indoors, you’ll need to provide a trellis or climbing structure for the hop bines.
Growing hops indoors is best suited for those who enjoy a gardening challenge and have the necessary equipment. It’s unlikely to yield the same quantity of hops as an outdoor garden, but it can be a fun way to experiment and produce a small harvest.
Harvesting Hops: When and How to Pick
The timing of your hop harvest is critical for achieving the best flavor and aroma for your home brewing hops. Hops are typically ready for harvest in late August or September, depending on your climate and the variety.
Signs of Ripeness
- Feel: The cones will feel slightly papery and will no longer feel stiff and “green.”
- Smell: The lupulin glands (the yellow, powdery substance inside the cone) will be well-developed and will release a strong, pungent aroma when you gently squeeze the cone. Rub a cone between your fingers; if they become sticky and yellow, they are likely ready.
- Appearance: The cone will feel lighter and more airy. The “bracts” (leaf-like structures) will have started to loosen slightly.
Harvesting Techniques
- Cutting the Bines: The easiest way to harvest is to cut the entire hop bine from its support structure about 3 feet from the ground.
- Stripping the Cones: Hang the bines in a dry, well-ventilated area (like a garage or shed) and let them cure for a few days. Once cured, the cones will detach easily by rubbing them against a rough surface or by simply pulling them off the bine.
- Picking Individually: Alternatively, you can pick cones individually from the plant as they reach maturity. This allows for a more staggered harvest but can be time-consuming.
Processing and Storing Your Hops
Once you’ve harvested your hops, proper processing and storage are key to preserving their quality and aroma for your home brewing hops.
Drying the Hops
Proper drying is essential to prevent mold and preserve the lupulin.
- Air Drying: The most common method is to spread the harvested cones on screens or netting in a well-ventilated area, out of direct sunlight. This can take several days to a week. The cones are dry when they are brittle and crumble easily when squeezed.
- Dehydrator: A food dehydrator set to a low temperature (around 120-130°F or 49-54°C) can speed up the drying process. Watch them closely to prevent over-drying.
Processing into Pellets or Plugs (Optional)
For longer-term storage and ease of use in brewing, many home growers process their hops into pellets or plugs. This usually involves specialized equipment. However, dried whole cones are perfectly viable for homebrewing.
Storing Hops
Proper storage is crucial to maintain hop freshness.
- Vacuum Sealing: This is the preferred method. Place the dried, cooled hops into vacuum-seal bags and remove as much air as possible.
- Freezer Storage: Store vacuum-sealed bags in the freezer. Hops stored this way can retain their quality for 1-2 years.
- Airtight Containers: If vacuum sealing isn’t an option, use airtight containers or heavy-duty freezer bags, removing as much air as possible. Store these in the freezer.
Year-Round Hop Care: Pruning and Winterizing
Your hop cultivation efforts don’t end with the harvest. Proper care throughout the year ensures strong growth in subsequent seasons.
Pruning
After the harvest, it’s time to prune your hop plants.
- Cutting Back: Cut the hop bines down to about 2-3 feet from the ground. The roots will overwinter and send up new shoots in the spring.
- Removing Old Bines: Dispose of the old bines away from your garden to prevent the spread of any potential diseases.
Winterizing
Hops are perennial plants, meaning they will return year after year. They are also quite hardy.
- Mulching: Apply a thick layer of mulch (straw, compost, or shredded leaves) around the base of the plants after the ground begins to freeze. This protects the crowns and roots from extreme cold.
- Protecting Structures: If you have lighter trellises, consider taking them down or reinforcing them for the winter to prevent damage from snow and ice.
Frequently Asked Questions (FAQ)
Q1: How long does it take for hops to grow?
Hops are fast growers. You can expect to see significant growth in the first year, and they typically reach maturity and produce a good harvest in their second year. Some varieties may produce a smaller harvest in the first year.
Q2: Can I grow hops from seed?
While possible, growing hops from seed is not recommended for most home growers. Hop plants are dioecious, meaning they have separate male and female plants. You typically need female plants for cone production. Seeds are often a result of pollination, which can lead to unpredictable characteristics. It’s much more reliable to start with hop rhizomes or established plants.
Q3: How much space do hops need?
Hops require ample space. If planting multiple plants, space them at least 3-4 feet apart to allow for good air circulation and vine growth. Remember that the hop bines will grow very tall and spread out.
Q4: When is the best time to plant hops?
The best time to plant hop rhizomes is in early spring, as soon as the ground can be worked and the risk of hard frost has passed. This allows the roots to establish before the heat of summer.
Q5: How do I know when my hops are ready to harvest?
Your hops are ready when the cones feel slightly papery, release a strong aroma when squeezed, and the lupulin glands are abundant and sticky. The cones will also feel lighter and the bracts will start to loosen.
Q6: What are the best hop varieties for beginners?
For beginners, Cascade, Centennial, or Chinook are excellent choices. They are relatively hardy, have vigorous growth, and are versatile for brewing.
Q7: Can I grow hops in containers?
Yes, you can grow hops in containers, but they need to be large (at least 5-10 gallons) to accommodate their extensive root system. Providing adequate support is also crucial, even for container-grown plants. This is a good option for those with limited garden space or for attempting growing hops indoors.
Q8: What is the best soil for growing hops?
Hops thrive in rich, well-drained, loamy soil with a pH between 6.0 and 7.0. Amending the soil with compost or aged manure before planting will greatly improve the growing conditions.
Conclusion: Your Journey to Homegrown Hops
Embarking on DIY hop growing is a fulfilling journey that connects you directly to the ingredients of your favorite beers. From selecting the best hops to grow to the satisfaction of harvesting hops for your own brewing, the process is rich with rewards. With careful attention to site selection, planting, support, watering, and pest management, you can successfully cultivate these magnificent plants and enjoy the fruits of your labor. Happy growing!