
Can you make your own furniture polish? Absolutely! Making your own furniture polish is a fantastic way to revive and protect your wooden furniture using simple, natural ingredients you likely already have at home. These DIY furniture polish recipes are not only cost-effective but also kinder to your health and the environment, steering clear of harsh chemicals often found in commercial products. Whether you’re looking for a quick shine or a deeper treatment for cleaning wood furniture, these homemade wood polish options offer a gentle yet effective solution.
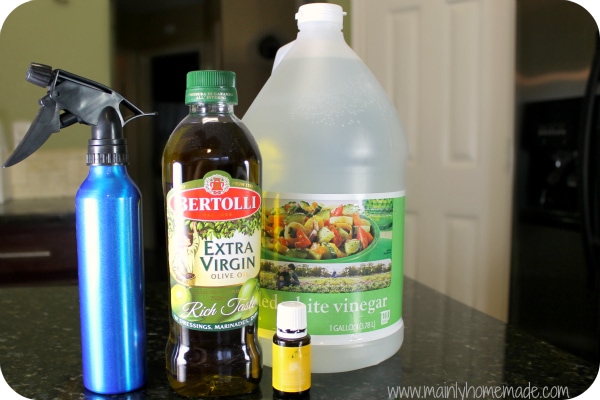
Image Source: www.mainlyhomemade.com
Why Choose Homemade Furniture Polish?
The appeal of natural furniture polish lies in its simplicity and its ability to nourish wood without leaving behind a residue that can build up over time. Many store-bought polishes contain silicones, petroleum distillates, or artificial fragrances, which can dull wood finishes or even cause damage with repeated use. By contrast, homemade versions rely on the inherent conditioning properties of oils and natural acids to enhance the wood’s natural beauty and provide protection. Making your own polish is also a rewarding experience, allowing you to control the ingredients and tailor the scent to your preference.
Benefits of DIY Polishes:
- Natural Ingredients: Avoids synthetic chemicals, fragrances, and petroleum-based products.
- Cost-Effective: Uses common household items, saving money compared to premium brands.
- Customizable: You can adjust scents and ingredients for specific wood types or preferences.
- Environmentally Friendly: Reduces chemical waste and uses sustainable ingredients.
- Gentle on Wood: Nourishes and protects without harsh abrasives or damaging residues.
Essential Ingredients for Homemade Furniture Polish
The beauty of homemade wood polish is its reliance on a few key natural ingredients that work wonders for wood. These ingredients are readily available and offer distinct benefits for restoring furniture and maintaining its luster.
Key Components:
- Oils: These are the backbone of most polishes, providing moisture and a protective barrier.
- Olive Oil: A readily available option that provides good conditioning.
- Mineral Oil: A food-grade, odorless, and colorless oil that is excellent for wood conditioning, especially for unfinished or raw wood.
- Walnut Oil: Known for its drying properties and ability to impart a lovely sheen.
- Linseed Oil (Boiled): A traditional wood finish that dries to a hard, protective layer. Use with caution as it can yellow over time and requires careful handling due to flammability risks. Note: Always use boiled linseed oil for finishing, as raw linseed oil dries very slowly.
- Almond Oil: A lighter oil that is good for polishing.
- Acids: These help to clean and lift grime, while also adding a subtle shine.
- Vinegar (White or Apple Cider): Effective at cutting through grease and tarnish.
- Lemon Juice: Adds a fresh scent and has mild bleaching and cleaning properties.
- Waxes: These provide a protective layer and a smooth, durable finish.
- Beeswax: A natural wax that offers excellent protection, water resistance, and a beautiful sheen. This is a star ingredient in many beeswax furniture polish recipes.
- Carnauba Wax: A harder vegetable wax that provides a very durable and high-gloss finish.
- Aromatics: For a pleasant scent.
- Essential Oils: Citrus oils (lemon, orange), lavender, or sandalwood can add a natural fragrance.
Oils for Furniture Polish: A Closer Look
When selecting an oil for furniture polish, consider the type of wood and the desired finish.
- Mineral Oil: This is a very safe and effective choice for most wood surfaces, especially those that are not heavily finished or sealed. It penetrates well and won’t go rancid.
- Olive Oil: While accessible, olive oil can sometimes leave a slight tackiness or even go rancid over extended periods, particularly in warmer climates. It’s best used in polishes that are made in smaller batches and used regularly.
- Linseed Oil: As mentioned, boiled linseed oil is a finishing oil that dries and hardens. It’s excellent for unfinished wood or to add a protective layer to existing finishes, but it requires more drying time and careful application to avoid a gummy residue. It’s less of a “polish” and more of a “finish” in its own right.
- Walnut Oil: Dries faster than linseed oil and offers a good balance of protection and a natural sheen.
Simple & Effective Homemade Furniture Polish Recipes
These recipes are designed to be easy to follow and use minimal ingredients. They are excellent for general dusting and light polishing.
Recipe 1: The Classic Lemon Oil Furniture Polish
This is perhaps the most well-known lemon oil furniture polish recipe. It’s simple, smells wonderful, and leaves a lovely sheen.
What You’ll Need:
- 1/4 cup Olive Oil (or Mineral Oil for a more neutral option)
- 1/4 cup White Vinegar (or Lemon Juice)
- 5-10 drops Lemon Essential Oil (optional, for scent)
Instructions:
- Combine the olive oil and vinegar (or lemon juice) in a clean glass jar or bottle.
- Add the lemon essential oil, if using.
- Screw on the lid tightly and shake well to combine.
- To Use: Shake the bottle vigorously before each use, as the oil and vinegar will separate. Apply a small amount to a soft, lint-free cloth. Wipe the furniture in the direction of the wood grain. Buff with a clean, dry cloth until a shine appears.
Why it Works: The oil nourishes the wood, while the vinegar or lemon juice acts as a mild cleaner to remove dirt and grime, leaving a pleasant shine.
Recipe 2: Simple Oil and Vinegar Polish (No Lemon Essential Oil)
This is an even simpler version, focusing on the cleaning and nourishing aspects without added scent.
What You’ll Need:
- 1/2 cup Olive Oil (or Mineral Oil)
- 1/2 cup White Vinegar (or Apple Cider Vinegar)
Instructions:
- Mix the oil and vinegar in a clean spray bottle or jar.
- Shake well to combine.
- To Use: Shake before each use. Lightly spray or dab onto a soft cloth. Wipe down the furniture, following the wood grain. Buff with a clean, dry cloth for a soft sheen.
Why it Works: The oil replenishes moisture in the wood, and the vinegar helps to lift dust and light grime. It’s a straightforward way to maintain wood surfaces.
Recipe 3: The Beeswax Furniture Polish Recipe for Deep Nourishment
This beeswax furniture polish recipe offers superior protection and a richer, more durable shine. It’s excellent for restoring furniture and providing a lasting finish.
What You’ll Need:
- 1/4 cup Beeswax Pellets (or grated beeswax)
- 1/2 cup Olive Oil (or Almond Oil for a lighter feel)
- 1/4 cup Turpentine (optional, for added shine and faster drying, use in a well-ventilated area)
- 10-15 drops Essential Oil (e.g., Lavender, Sandalwood, or Orange, for scent)
Instructions:
- Melt the Beeswax: Place the beeswax pellets in a double boiler (or a heatproof bowl set over a pot of simmering water). Gently melt the beeswax, stirring occasionally.
- Add the Oil: Once the beeswax is completely melted, stir in the olive oil (or almond oil) and turpentine (if using). Stir until well combined.
- Add Scent: Remove from heat and let it cool slightly for a few minutes. Stir in the essential oils.
- Pour and Cool: Carefully pour the mixture into clean, heatproof jars or tins.
- Set: Let the polish cool completely. It will solidify into a paste.
- To Use: Apply a small amount of the paste to a soft cloth. Rub it into the wood in a circular motion, then follow with the grain. Buff with a clean, dry cloth to achieve a beautiful, protective sheen.
Why it Works: Beeswax creates a durable, water-resistant barrier that protects the wood and gives it a lovely luster. The oils nourish the wood, and turpentine can help the polish penetrate and dry faster. Important safety note: Turpentine is flammable. Work in a well-ventilated area and keep away from open flames.
Using Vinegar for Furniture Polish (and Cleaning)
Vinegar furniture polish is a great option for a quick clean and shine, especially on tables or surfaces prone to spills and sticky residue. However, it’s important to use it correctly.
Vinegar as a Cleaner:
Vinegar’s acidity makes it an excellent natural cleaner. It can cut through grease, remove water spots, and even help disinfect surfaces.
- Dilution is Key: Always dilute vinegar with water. A common ratio for general cleaning is 1 part vinegar to 2 parts water. For more stubborn spots, you can use a 1:1 ratio.
- Test First: Always test a small, inconspicuous area of your furniture first to ensure it doesn’t damage the finish. Some antique finishes or lacquers might be sensitive to acids.
- Wipe Away Residue: After using a vinegar solution, it’s a good idea to wipe the surface with a damp cloth to remove any residual vinegar smell or acidity, and then dry it thoroughly.
Vinegar and Oil Combination for Polish:
As seen in Recipe 1 and 2, combining vinegar with oil offers a dual-action approach. The vinegar cleans, and the oil nourishes and shines. The key is that the oil helps to buffer the acidity of the vinegar, making it gentler on the wood.
Polishing and Restoring Furniture with Homemade Solutions
Beyond just daily dusting, these homemade wood polish recipes can also play a role in restoring furniture that has lost its luster or shows signs of wear.
Enhancing Wood Shine:
- Regular Polishing: Consistent use of a natural furniture polish will keep wood looking its best. A quick wipe-down with a microfiber cloth dampened with your chosen polish can remove dust and restore a subtle shine.
- Buffing is Crucial: The final buffing step with a clean, dry cloth is essential. It removes any excess polish and brings out the depth of the wood’s natural grain.
Tackling Scratches and Dullness:
While homemade polishes are not typically designed to fill deep scratches, they can certainly improve the appearance of minor surface abrasions and dullness.
- Light Scratches: A good oil-based polish, particularly one containing beeswax, can help to mask very fine surface scratches by filling them with oil and wax, making them less visible.
- Dull Finishes: For furniture that has lost its sheen due to accumulated grime or oxidation, a polish like the beeswax recipe can help to lift the old layer and impart a fresh, protective coating.
Reviving Old Furniture:
For antique or vintage pieces, always err on the side of caution.
- Gentle Application: Use a soft cloth and apply the polish sparingly. Avoid rubbing too vigorously, especially on delicate finishes.
- Consider the Finish: If you’re unsure about the type of finish on your antique furniture, a very mild solution (like diluted mineral oil) is often the safest bet. Avoid anything too acidic.
Tips for Making and Using Homemade Furniture Polish
To get the best results and ensure the longevity of your homemade polishes, follow these tips:
Storage and Shelf Life:
- Glass Containers: Store your homemade polishes in clean glass jars or bottles. This prevents potential leaching of chemicals from plastic and is better for the environment.
- Airtight Seal: Ensure containers are sealed tightly to prevent evaporation or contamination.
- Cool, Dark Place: Store polishes in a cool, dark place, away from direct sunlight and heat, which can degrade the ingredients.
- Shelf Life:
- Oil-based polishes without vinegar/lemon juice generally last longer, up to 6-12 months if stored properly.
- Polishes containing vinegar or lemon juice have a shorter shelf life, usually 2-4 months, due to the acidity.
- Beeswax polishes, when properly made and stored, can last for a year or more.
- Smell Test: If a polish develops an off-smell or looks strange, it’s best to discard it and make a fresh batch.
Application Techniques:
- Use Soft Cloths: Always use soft, lint-free cloths, such as old cotton t-shirts, microfiber cloths, or lambswool applicators. Avoid abrasive materials that can scratch the wood.
- Less is More: Start with a small amount of polish on your cloth. You can always add more if needed. Over-application can lead to a sticky residue.
- Direction of Grain: Apply the polish and buff in the direction of the wood grain for the smoothest and most professional finish.
- Don’t Saturate: Avoid soaking the wood. A light, even coating is all that’s needed.
- Allow to Dry: For recipes that contain drying oils or turpentine, allow adequate drying time before using the furniture heavily or placing items on it.
Choosing the Right Polish for Your Wood:
Different wood types and finishes might respond differently to various polishes.
- Sealed Wood: Most finished wood surfaces (varnished, polyurethaned) can handle mild polishes like the lemon oil or oil/vinegar blends.
- Unfinished Wood: Raw wood benefits greatly from oil-based polishes, particularly mineral oil or linseed oil-based finishes, which penetrate and protect the wood from within.
- Oiled Finishes: If your furniture already has an oil finish, using a simple oil-based polish or a beeswax blend will help maintain and enhance it.
- Waxed Finishes: If your furniture is finished with wax, a beeswax-based polish is ideal for replenishing and protecting that finish.
Troubleshooting Common Issues
Even with simple recipes, you might encounter minor hiccups.
Sticky Residue:
- Cause: Using too much polish or not buffing enough.
- Solution: Dampen a clean cloth with a little mineral spirits (for oil-based polishes) or plain water (for vinegar-based ones) and wipe down the surface. Then, buff vigorously with a dry cloth. For beeswax polishes, you might need to use a cloth with a bit more elbow grease or even a very fine steel wool (0000 grade) very gently, followed by buffing.
Dull Finish After Polishing:
- Cause: Not enough buffing, or the polish was too diluted, or the wood was very dry.
- Solution: Buff again with a clean, dry cloth. If the wood still looks dull, you might need to apply another very thin layer of polish and buff again. For very dry wood, a richer oil (like mineral oil) might be more beneficial.
White Marks or Haziness:
- Cause: Often caused by moisture trapped in the finish, sometimes exacerbated by alcohol-based cleaners or excessive moisture from polishes.
- Solution: Try buffing with a soft cloth. If that doesn’t work, a very mild solution of baking soda and water (a paste) can sometimes help lift these marks, but test in an inconspicuous area first as baking soda can be abrasive. Ensure the area is completely dry afterward. For a more robust solution, the beeswax polish can sometimes help to fill and mask these marks.
Frequently Asked Questions (FAQ)
Q1: Can I use olive oil directly on furniture?
A1: While olive oil can be used on furniture, it’s best incorporated into a polish recipe. Undiluted olive oil can sometimes leave a greasy feel, attract dust, or even go rancid over time, especially in warmer climates. It’s generally better to mix it with other ingredients like vinegar or wax.
Q2: How often should I polish my furniture?
A2: The frequency depends on your environment and how much the furniture is used. For most pieces, polishing once every 1-3 months is sufficient. You can do a quick dusting with a dry cloth more frequently. If furniture is in a high-traffic area or prone to spills, you might polish more often.
Q3: Will homemade polish remove scratches?
A3: Homemade polishes are excellent for improving the appearance of minor surface scratches by making them less noticeable through conditioning and shine. However, they are not designed to repair deep gouges or significant damage to the wood or finish.
Q4: Is vinegar safe for all wood finishes?
A4: Vinegar is acidic and should be used with caution. Always dilute it and test in an inconspicuous spot first. Finishes like lacquer or shellac can be sensitive to acids and may be dulled or damaged. Oil-based or wax-based finishes are generally more tolerant. If in doubt, stick to oil-only polishes.
Q5: What is the best oil for furniture polish?
A5: Mineral oil is often considered one of the best oil for furniture polish because it’s food-grade, odorless, colorless, and does not go rancid. Walnut oil and almond oil are also good choices for a lighter finish. Olive oil is accessible but has a shorter shelf life.
Q6: How do I store homemade furniture polish?
A6: Store your homemade furniture polish in airtight glass containers in a cool, dark place. This helps maintain its quality and prevent spoilage.
Q7: Can I use beeswax furniture polish on painted furniture?
A7: Yes, a beeswax furniture polish can be used on painted furniture, especially chalk paint or milk paint finishes, to provide protection and a soft sheen. Apply a very thin layer and buff gently. Always test first in an inconspicuous area.
By embracing these DIY furniture polish recipes, you can effectively clean, nourish, and protect your wooden treasures, ensuring they remain beautiful for years to come, all while using the power of natural ingredients.