
Can you spray tan at home? Yes, you absolutely can achieve a beautiful, natural-looking tan in the comfort of your own home! This DIY guide will walk you through everything you need to know to master the art of self-tanning and achieve a gorgeous glow without stepping into a salon. From choosing the right products to the actual application, we’ve got you covered.
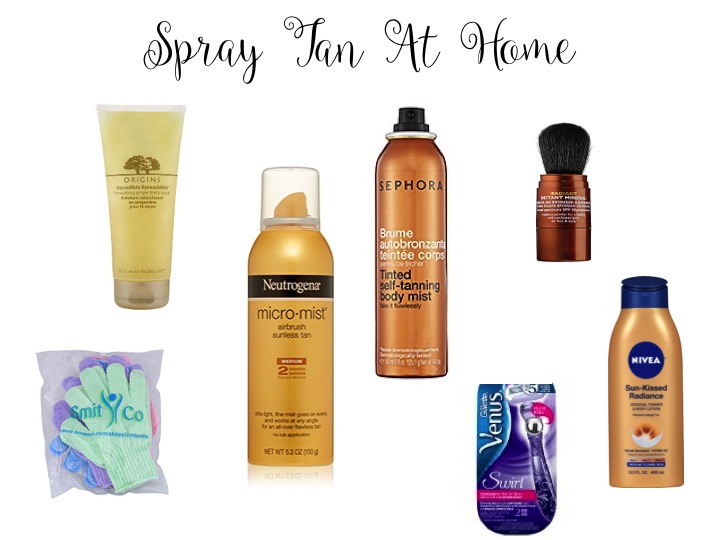
Image Source: www.fromscratchwithmaria.com
Why Choose At-Home Spray Tanning?
Opting for an at-home bronzer or sunless tanning solution offers a fantastic alternative to traditional tanning beds or spending hours in the sun, both of which carry significant health risks. Self-tanning allows you to control the depth of your tan, apply it whenever it suits your schedule, and save money compared to professional treatments. Plus, with the right techniques, you can achieve a streak-free, even finish that rivals salon results.
Gathering Your At-Home Spray Tan Kit
To achieve a professional-looking tan at home, you’ll need a few essential items. Think of this as your home spray tan kit.
Key Products for Your Kit:
- Tanning Mousse or Tanning Lotion: These are the most popular and user-friendly options for at-home use.
- Tanning Mousse: Typically dries quickly and is known for its easy application and often a faster developing time.
- Tanning Lotion: Can offer a more gradual build-up of color and often contains moisturizing ingredients. Some lotions are designed for daily use to maintain a tan.
- Exfoliating Mitt or Body Scrub: Crucial for preparing your skin.
- Tanning Mitt: A velvety mitt is essential for smooth, streak-free application and protecting your hands from staining.
- Spray Tan Machine (Optional): For a more professional, airbrushed finish, a spray tan machine can be a great investment. However, you can achieve excellent results with mousses and lotions alone.
- Back Applicator (Optional): If you struggle to reach your back, a long-handled applicator is a lifesaver.
- Disposable Underwear or Old Swimsuit: For application if you’re using a spray tan machine.
- Moisturizer: For post-tan hydration.
- Barrier Cream (e.g., Vaseline or thick moisturizer): To apply to dry areas like elbows, knees, ankles, and hands to prevent them from absorbing too much color.
- Old Towels or Dark Bed Sheets: To protect your surroundings.
Selecting Your Shade:
Tanning mousse and tanning lotion come in various shades: light, medium, dark, and sometimes ultra-dark.
- Beginners: Start with a light or medium shade. It’s easier to build color than to correct an overly dark tan.
- Fair Skin Tones: Often look best with light to medium shades.
- Medium Skin Tones: Can typically wear medium to dark shades.
- Dark Skin Tones: May prefer dark or ultra-dark shades to show the tan effectively, or use lighter shades for a subtle glow.
Gradual tanner lotions are excellent for a very subtle, natural-looking tan that builds over several days.
Pre-Tan Preparation: The Foundation for a Flawless Tan
Proper preparation is the secret to a long-lasting, streak-free tan. Do not skip these steps!
Exfoliation: Removing Old Skin Cells
- Timing: Exfoliate your skin 24 hours before your DIY spray tan.
- Why: This removes dead skin cells, creating a smooth canvas for the tanning product to adhere to evenly.
- How: Use an exfoliating mitt or a body scrub in circular motions. Pay extra attention to rough areas like elbows, knees, and heels. Rinse thoroughly with cool water.
Shaving and Waxing: Timing is Key
- Timing: Shave or wax at least 24 hours before tanning.
- Why: Doing this after tanning can remove the tan itself. Performing it beforehand allows your pores to close, preventing the tan from settling into them and creating a dotted appearance.
Moisturizing Dry Areas: Preventing Patchiness
- Timing: Apply a barrier cream to your dry areas a few minutes before you apply your tan.
- Areas to Cover:
- Elbows
- Knees
- Ankles
- Knuckles
- Toes
- Eyebrows (a thin layer is enough)
- Why: These areas tend to absorb more tanner, leading to a darker, unnatural look. The barrier cream acts as a shield.
Wardrobe Choices: What to Wear
- During Application: Wear old, dark clothing. A dark-colored bra and underwear are often recommended if you’re not using a spray tan machine. If using a machine, disposable underwear or an old swimsuit is ideal.
- After Application: Wear loose, dark clothing. Avoid tight-fitting garments, bras, and socks that can rub off the tan before it has fully developed.
The Application Process: Step-by-Step
Whether you’re using tanning mousse, tanning lotion, or a spray tan machine, the application principles are similar.
Using Tanning Mousse or Tanning Lotion:
- Protect Your Surroundings: Lay down old towels or dark sheets in the area where you’ll be tanning to catch any drips or excess product.
- Apply the Tan:
- With a Tanning Mitt: Pump a generous amount of tanning mousse or tanning lotion onto your tanning mitt.
- Application Technique: Start from your lower legs and work your way up. Use long, sweeping motions. Apply to each limb and body section individually, blending as you go.
- Key Areas:
- Legs: Apply in long, upward strokes.
- Arms: Apply from wrist to shoulder.
- Torso: Work in sections, ensuring even coverage.
- Face: Use a lighter hand or a gradual tanner specifically designed for the face. You can also use a tanning mitt or a blending brush. Some people prefer not to tan their face initially and use an at-home bronzer instead for immediate color.
- Hands and Feet: This is where many mistakes happen. Use the residual product on your mitt to lightly sweep over your hands and feet. Apply sparingly. Some prefer to use a tanning wipe or a very diluted solution for these areas.
- Blending is Crucial: After applying to a section, use the mitt to gently blend the edges, especially around joints like elbows and knees, to avoid harsh lines.
- The Back: If you can’t reach your back, use a back applicator or ask a friend for help.
- Hands and Face (Final Touches):
- For hands, wash your palms and between your fingers with soap and water after application to remove excess product.
- For the face, apply the tan in circular motions, blending down your neck.
Using a Spray Tan Machine:
A spray tan machine allows for a fine mist application, creating a very even and professional finish.
- Set Up: Work in a well-ventilated area. A pop-up tent or a dedicated spray tan booth can help contain overspray. Ensure your machine is set up according to the manufacturer’s instructions.
- Prepare the Solution: Fill the spray gun cup with your chosen tanning solution.
- Prepare Yourself: Wear disposable underwear or an old swimsuit. Apply barrier cream to dry areas.
- Application Technique:
- Hold: Hold the spray gun about 6-8 inches from your skin.
- Move: Move your body in a controlled manner while spraying. Start with your legs and work your way up.
- Spraying Motion: Use smooth, consistent strokes. Move your arm and the spray gun together. Don’t spray too much in one spot.
- Arms and Legs: Spray from ankle to thigh and wrist to shoulder.
- Torso: Spray from the bottom up, ensuring even coverage.
- Back: Turn your back to the machine and spray in a downward motion, then turn around to ensure evenness. You can also use a spray tan tent with a back panel.
- Face: Hold the spray gun further away (around 10-12 inches) for a lighter mist. Alternatively, use a tanning mitt with a tanning mousse or gradual tanner for the face.
- Drying: Allow the mist to settle. Most solutions dry quickly.
Post-Tan Care: Maximizing Your Glow
Once you’ve applied your tan, the care you give it will determine how long it lasts and how it fades.
The Development Phase: Waiting for the Magic
- Drying Time: Allow the product to dry completely. This can take anywhere from 5-20 minutes, depending on the product.
- Avoid Water and Sweat: For at least 4-8 hours (check your product’s instructions), avoid water, sweat, and any activities that might cause you to perspire. This is crucial for the tan to develop properly.
- Wear Loose Clothing: Continue to wear loose, dark clothing during the development time.
Rinsing Off: The First Reveal
- Timing: After the recommended development time (usually 4-8 hours), rinse your skin with lukewarm water.
- What to Expect: You’ll see a lot of color wash off. This is the bronzer or guide color, not the actual tan. The tan is developing underneath.
- No Soap (Initially): Try to avoid using soap or harsh scrubbing during this first rinse. Gently pat your skin dry with a towel.
Maintaining Your Tan: Keeping the Glow
- Moisturize Daily: Apply a good quality moisturizer morning and night. This keeps your skin hydrated and helps the tan fade evenly. Look for moisturizers that are free of harsh chemicals or exfoliants.
- Avoid Hot Baths and Long Showers: While you can shower and bathe, very hot water and prolonged soaking can shorten the life of your tan.
- Gentle Exfoliation: As your tan begins to fade, you can gently exfoliate your skin to ensure an even fade. However, avoid harsh scrubbing.
- Touch-Ups: Use a gradual tanner or a tanning lotion for touch-ups in between full applications, especially on areas that fade faster.
- Avoid Chlorine and Saltwater: Prolonged exposure to chlorinated pools and saltwater can strip your tan. Rinse off with fresh water as soon as possible after swimming.
Troubleshooting Common At-Home Tanning Issues
Even with careful preparation, you might encounter a few hiccups. Here’s how to fix them:
Streaky Tan:
- Cause: Uneven application, not enough blending, or applying to dry skin.
- Solution: For a minor streak, you can try to gently buff it out with a tanning mitt and a little bit of lotion. For more stubborn streaks, a tan eraser product or a lemon juice and baking soda paste can help lighten the area. In the future, focus on smooth, even strokes and thorough blending.
Orange Hue:
- Cause: The DHA (dihydroxyacetone) in the tanner reacted with the pH of your skin, or the shade was too dark for your skin tone.
- Solution: A tan eraser or a light scrub can help. Baking soda and lemon juice paste is also a common remedy. Ensure you’re choosing a shade appropriate for your skin tone and that your skin is clean and exfoliated before application.
Tan Too Dark:
- Cause: Left the product on too long, applied too many layers, or chose a shade that was too dark.
- Solution: A tan eraser or a gentle exfoliation can lighten it. You can also try soaking in a warm bath with Epsom salts. For future applications, use a lighter shade or apply a thinner layer.
Tan Not Developing:
- Cause: Old product, improper storage, or skin was not properly prepared (e.g., oily residue from lotions).
- Solution: Ensure your products are within their expiry date and stored correctly. Re-exfoliate and try again.
Frequently Asked Questions About At-Home Spray Tanning
Q1: How long does an at-home spray tan last?
A1: An at-home spray tan typically lasts between 5 to 10 days, depending on your skin type, how well you prepare and maintain it, and your lifestyle. Daily moisturizing and avoiding harsh exfoliants will help it last longer.
Q2: Can I use an at-home spray tan on my face?
A2: Yes, you can! Many people use their regular tanning mousse or tanning lotion on their face. However, for a more subtle and natural look, consider using a product specifically formulated for the face, a gradual tanner, or a very light application with your tanning mitt. Some prefer to use an at-home bronzer for a quick, temporary glow on the face.
Q3: Is it safe to spray tan at home?
A3: Yes, sunless tanning products are generally safe when used as directed. They use DHA, which reacts with the dead skin cells on the surface of your skin to create a temporary color. It’s important to follow the instructions carefully and avoid inhaling the product.
Q4: How often can I spray tan at home?
A4: You can reapply your at-home tan every 5-7 days, or more frequently if you use a gradual tanner to maintain your color. Listen to your skin; if it feels dry or irritated, take a break.
Q5: What is the difference between tanning mousse and tanning lotion?
A5: Tanning mousse is typically lightweight and dries very quickly, often developing a deeper color in less time. Tanning lotion can be richer and more moisturizing, often providing a more gradual tan that builds over a few days with repeated use. Some find lotion easier to blend, while others prefer the speed of mousse.
Q6: What are the benefits of using a spray tan machine?
A6: A spray tan machine allows for a finer, more even mist application, which can lead to a smoother, more natural-looking, airbrushed finish. It’s also more efficient for full-body applications and can achieve a more consistent color, especially if you have experience using one.
Q7: How do I prevent my palms and soles from turning dark?
A7: The key is barrier cream and careful application. Apply a thick layer of Vaseline or a heavy moisturizer to your palms, between your fingers, and around your nails before tanning. After applying tan to your body, use the residual product on your tanning mitt and quickly sweep over your hands and feet. Then, wash your palms and between fingers with soap and water to remove excess. Some people use tanning wipes for these areas.
Achieving a beautiful at-home bronzer glow is within your reach with a little practice and the right approach. By following this comprehensive guide, you can confidently master the DIY spray tan and enjoy a radiant, sun-kissed look any time you desire. Happy tanning!