
Can you winterize home plumbing yourself? Yes, you can effectively winterize your home plumbing to prevent costly damage from freezing temperatures. Who is responsible for checking plumbing before winter? Homeowners are responsible for ensuring their plumbing is prepared for cold weather.
As the biting winds of winter approach, the thought of frozen pipes can send a shiver down anyone’s spine. A burst pipe due to freezing can lead to extensive water damage, mold growth, and astronomical repair bills. Fortunately, by taking proactive steps, you can significantly protect pipes from freezing and keep your home’s plumbing system in top shape throughout the coldest months. This guide will walk you through the essential steps to winterize your home plumbing, ensuring peace of mind until spring.
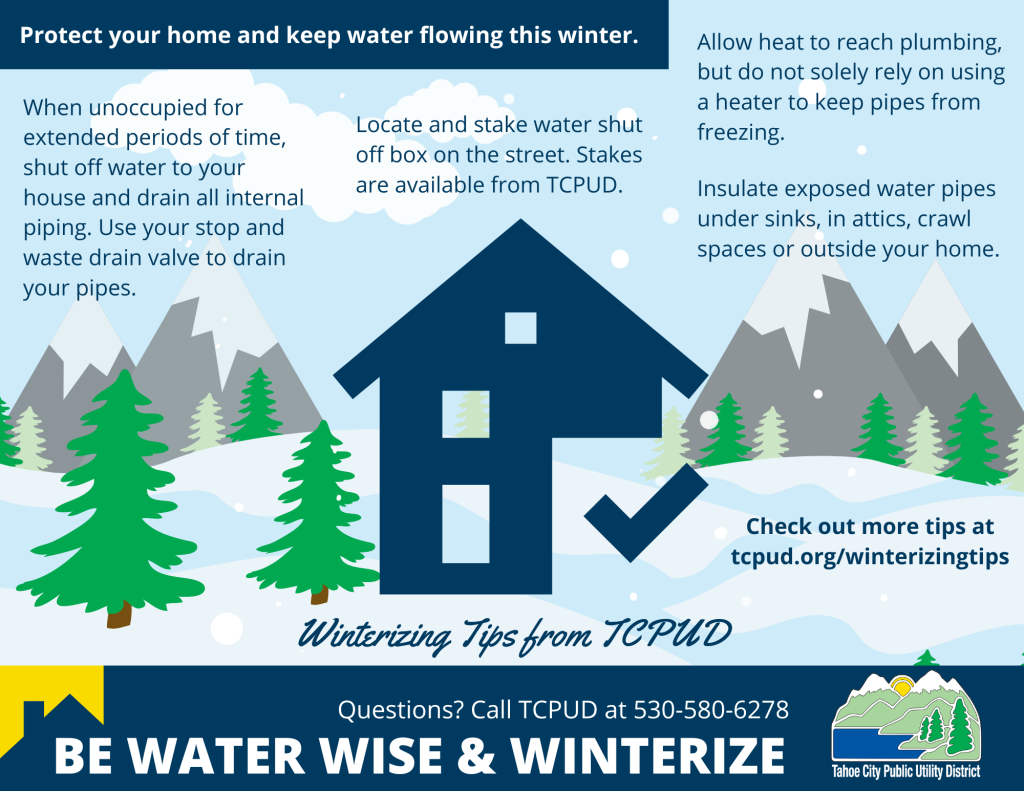
Image Source: www.tcpud.org
Why Winterizing Your Plumbing Matters
Freezing temperatures pose a serious threat to your home’s water pipes. When water freezes, it expands. If pipes are filled with water and exposed to freezing temperatures, this expansion can create immense pressure. This pressure can cause pipes to crack or even burst. A burst pipe can release a torrent of water, leading to severe structural damage, ruined belongings, and a significant financial burden for repairs. Beyond the immediate damage, water from a burst pipe can seep into walls, floors, and foundations, promoting mold and mildew growth, which can create unhealthy living conditions.
Essential Steps for Winterizing Your Plumbing
Preparing your home for winter involves a series of straightforward yet crucial tasks. Tackling these in advance will save you from potential disasters.
1. Drain Your Water Heater
Your water heater is a vital part of your home’s plumbing, and it needs attention before winter sets in.
Why Drain Your Water Heater?
Over time, sediment can build up at the bottom of your water heater. This sediment can reduce efficiency and even cause damage. Draining the tank helps remove this sediment and ensures your water heater operates more smoothly. It also provides an opportunity to inspect the tank for any signs of corrosion or wear.
How to Drain Your Water Heater:
- Turn off the power: For electric water heaters, switch off the power at the circuit breaker. For gas water heaters, turn the thermostat to the “PILOT” or “OFF” setting.
- Close the cold water supply: Locate the cold water shut-off valve, usually on the pipe entering the top of the water heater. Turn the valve to close off the water supply.
- Connect a hose: Attach a garden hose to the drain valve at the bottom of the water heater.
- Open a hot water faucet: Open a hot water faucet in your home to allow air to enter the tank, which helps the water drain more easily.
- Open the drain valve: Carefully open the drain valve on the water heater. Be cautious, as the water can be hot.
- Drain the tank: Let the water drain completely. This can take some time.
- Flush the tank (optional but recommended): Once most of the water is out, briefly open the cold water supply valve to flush out any remaining sediment. Then, close the cold water supply again.
- Close the drain valve: Once the tank is empty, close the drain valve tightly.
- Refill the tank: Close the hot water faucet you opened earlier. Open the cold water supply valve to begin refilling the tank. Let the tank fill completely.
- Turn on the power: Once the tank is full, turn the power back on for electric water heaters or relight the pilot for gas water heaters. Ensure you don’t turn the power back on before the tank is full, as this can damage the heating elements.
2. Turn Off Outdoor Faucets and Disconnect Hoses
Outdoor plumbing is particularly vulnerable to freezing.
Protecting Your Outdoor Faucets:
- Turn off the water supply: Locate the shut-off valve for each outdoor faucet. These are usually found inside your home, in the basement, crawl space, or utility room, on the pipe leading to the outdoor faucet. Turn the valve to the off position.
- Open the outdoor faucet: After turning off the indoor shut-off valve, open the outdoor faucet to allow any remaining water in the pipe to drain out. Leave the faucet open to prevent water from accumulating and freezing.
- Disconnect garden hoses: Always disconnect garden hoses from outdoor spigots. Hoses left attached can trap water, which can freeze and expand, damaging the faucet and the pipe it’s connected to. Store hoses indoors or in a protected area.
3. Insulate Exposed Pipes
Insulate pipes that are in unheated areas or exposed to cold.
Areas to Focus On:
- Basements and crawl spaces: These areas are often unheated and can experience freezing temperatures. Pay special attention to pipes running along exterior walls.
- Garages and attics: If these spaces have plumbing, they are prime candidates for insulation.
- Under sinks: Pipes under kitchen and bathroom sinks, especially those on exterior walls, can benefit from insulation.
Insulation Methods:
- Pipe sleeves: Foam pipe sleeves are readily available at hardware stores and are easy to install. They simply slip over the pipes.
- Pipe wrap: Fiberglass or foam pipe wrap can also be used. Ensure it’s applied snugly to the pipe with tape.
- Mineral wool or fiberglass insulation: For larger areas or pipes in colder locations, consider wrapping them with fiberglass or mineral wool insulation and covering it with plastic sheeting to protect it from moisture.
4. Prepare Basement Pipes
Your basement often houses a significant portion of your home’s plumbing.
Securing Your Basement Plumbing:
- Check for drafts: Seal drafts around windows, doors, and any penetrations in the basement walls where cold air can enter. Use caulk or weatherstripping to close these gaps.
- Insulate basement pipes: As mentioned earlier, insulate pipes in the basement, particularly those near exterior walls or in unheated areas.
- Open cabinet doors: During extreme cold snaps, opening cabinet doors under sinks can allow warmer air from the house to circulate around the pipes, helping to prevent freezing.
5. Winterize Your Sprinkler System
Your underground sprinkler system also needs protection from winter’s chill.
Steps to Winterize Your Sprinkler System:
- Shut off the main water supply: Locate the shut-off valve for your sprinkler system, usually near your main water meter. Turn it off.
- Drain the system: The most common method is to use compressed air. Connect an air compressor to an accessible blow-out connection (often located near the backflow preventer). With the sprinkler heads closed, blow compressed air through the system to force out all the water. It’s crucial to use the correct air pressure to avoid damaging the system. Alternatively, some systems have drain valves that can be opened to allow gravity to drain the water.
- Remove and store backflow preventers: If your system has a backflow preventer, it’s advisable to remove it and store it indoors to prevent damage from freezing.
6. Check for Leaks
Before winter truly sets in, it’s a good time to check for leaks.
Why Checking for Leaks is Important:
- Prevent further damage: Even small leaks can worsen over time and lead to significant water waste and potential damage, especially in cold weather if the leaking water freezes.
- Improve efficiency: A leaky faucet or pipe can also increase your water and energy bills.
How to Check for Leaks:
- Listen: Listen for the sound of running water when no faucets are on.
- Look: Visually inspect all visible pipes, faucets, and connections for drips or moisture.
- Water meter test: Turn off all water-using appliances and faucets in your home. Check your water meter. If the dial continues to move, you likely have a leak somewhere.
7. Prepare Your Water Softener
If you have a water softener, it also requires some attention before winter.
Winterizing Your Water Softener:
- Bypass the unit: Most water softeners have a bypass valve. Engage the bypass to temporarily stop water from flowing through the softener. This is often done to protect the unit from potential freezing if the surrounding area gets very cold, especially if the softener is in an unheated garage or basement.
- Check brine tank: Ensure the brine tank is properly filled with salt and that the salt isn’t bridged (clumped together). If it is bridged, break up the salt.
- Follow manufacturer instructions: Always refer to your water softener’s owner’s manual for specific winterizing instructions, as procedures can vary by model.
Additional Tips for Protecting Pipes from Freezing
Beyond the core winterization steps, consider these extra measures:
Maintain a Consistent Indoor Temperature
- Keep your home warm: Even when you’re away, maintain a thermostat setting of at least 55°F (13°C) to keep pipes from freezing. Avoid setting the thermostat too low.
- Circulate air: If you have rooms that tend to be colder, use fans to circulate warm air into those areas.
Prevent Freezing in Unoccupied Spaces
- Shut off water to vacant areas: If you have a vacation home or a room that will be unoccupied for an extended period during winter, consider shutting off the main water supply to that area and draining the pipes.
- Empty appliances: Drain water from washing machines, dishwashers, and refrigerators with ice makers. Disconnect hoses to these appliances and drain them.
Use Heat Tape or Cable
- For critical pipes: In extremely cold climates or for pipes in particularly vulnerable locations, consider using electric heat tape or cable. These products generate a small amount of heat to keep pipes from freezing. Ensure you follow the manufacturer’s installation instructions carefully.
Consider Professional Help
- When in doubt, call a pro: If you are unsure about any of these steps or have a complex plumbing system, it’s always best to consult a qualified plumber. They can perform a thorough inspection and winterize your system professionally.
A Closer Look: Common Problem Areas and Solutions
Here’s a breakdown of typical trouble spots and how to address them:
| Problem Area | Potential Issues | Solutions |
|---|---|---|
| Exterior Walls | Pipes near or on exterior walls are more susceptible. | Insulate pipes thoroughly with foam sleeves or wrap. Seal any air leaks in walls or around windows. Open cabinet doors on the side of the house with exterior walls during extreme cold. |
| Unheated Garages/Sheds | Pipes in these areas are at high risk. | Disconnect outdoor faucets and drain them. If water lines run through these areas, insulate pipes extensively. Consider shutting off water and draining if the space is not used and is very exposed to cold. |
| Basements/Crawl Spaces | Cold air ingress can freeze pipes. | Seal drafts. Insulate pipes, especially those along foundation walls. Ensure basement windows and doors are properly sealed. |
| Kitchen/Bathroom Sinks | Pipes under sinks can be vulnerable. | Insulate pipes with foam sleeves. During extreme cold, open cabinet doors to allow warmer room air to circulate. |
| Sprinkler Systems | Water trapped in lines can freeze and burst pipes. | Winterize sprinkler system by draining all water. Use compressed air blow-out for thorough draining. Remove and store backflow preventers. |
| Outdoor Faucets | Water remaining in the faucet can freeze. | Turn off outdoor faucets using the interior shut-off valve. Disconnect garden hoses. Open the outdoor faucet to ensure it drains completely. |
Frequently Asked Questions (FAQ)
Q1: How do I know if my pipes have frozen?
A: Signs of frozen pipes include no water or a reduced flow from faucets, rattling or banging sounds from within the walls, and frost on exposed pipes.
Q2: What should I do if I suspect my pipes have frozen?
A: Do not turn on the water if you suspect a burst pipe. Turn off the main water supply immediately. You can try to thaw the frozen pipe by gently heating the area with a hairdryer, portable space heater (used safely), or by wrapping it with warm towels. Never use an open flame like a blowtorch.
Q3: How long does it take to winterize home plumbing?
A: The time needed can vary depending on the size of your home and the number of plumbing fixtures. For a typical home, it can take anywhere from 1-4 hours to complete the essential winterizing tasks.
Q4: Do I need to winterize my pipes if I live in a mild climate?
A: Even in milder climates, occasional freezes can occur. It’s still a good practice to at least turn off outdoor faucets, disconnect garden hoses, and check for leaks. If you experience occasional dips into freezing temperatures, insulating exposed pipes can provide extra protection.
Q5: Can I leave my water running to prevent pipes from freezing?
A: Letting a faucet drip can help prevent pipes from freezing, as the moving water is less likely to freeze. However, this is a temporary measure and uses water. It’s generally more effective and efficient to properly winterize your plumbing as described above.
By following these comprehensive steps, you can confidently protect pipes from freezing and ensure your home’s plumbing system remains functional and damage-free throughout the winter. Taking the time to winterize your plumbing is an investment that pays off by preventing costly repairs and avoiding the stress of frozen or burst pipes.