
Can you store homemade playdough? Yes, you absolutely can and should store homemade playdough properly to keep it fresh and long-lasting. What is the best way to store homemade playdough? The best way involves using airtight containers and keeping it in a cool, dry place. This guide will delve into the essential aspects of homemade playdough storage, ensuring your creations remain soft, pliable, and ready for endless creative fun. We’ll cover everything from the ideal storage containers to techniques that extend its shelf life, making your playdough-making and storing endeavors successful.
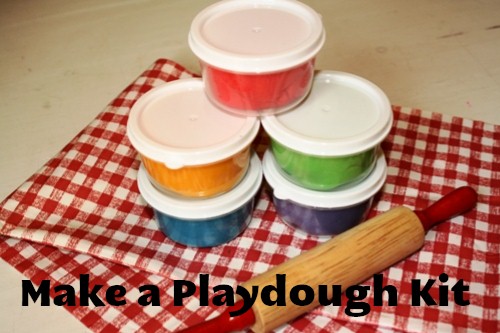
Image Source: lifeasmom.com
The Fundamentals of Playdough Preservation
Playdough, whether store-bought or homemade, is susceptible to drying out, becoming stiff, or even developing mold if not stored correctly. The primary goal of proper playdough preservation is to create an environment that prevents moisture loss and inhibits microbial growth. This might seem simple, but a few key practices can make a significant difference in how long your beloved playdough lasts.
Why Proper Storage Matters
- Prevents Drying Out: The most common enemy of playdough is air. Exposure to air causes the moisture within the dough to evaporate, leading to a crumbly, hard texture that is unpleasant and difficult to play with.
- Maintains Texture and Consistency: Soft, pliable playdough is crucial for enjoyable play. Incorrect storage can make it stiff, sticky, or uneven, diminishing the sensory experience.
- Inhibits Mold and Bacteria Growth: Homemade playdough, especially recipes containing water and food-grade ingredients, can become a breeding ground for mold and bacteria if left exposed to warmth and moisture. This can render the playdough unsafe for children.
- Saves Money and Resources: By storing your homemade playdough effectively, you reduce the need to constantly remake it, saving you time, money on ingredients, and the effort involved in the making process.
Essential Playdough Container Ideas
The container you choose for your homemade playdough is the first line of defense against spoilage. The key is an airtight container. This means a seal that prevents air from entering or escaping.
The Gold Standard: Airtight Containers
When we talk about airtight containers, we’re referring to those that create a strong seal.
- Plastic Food Storage Containers with Latching Lids: These are often the most accessible and effective. Look for ones with rubber or silicone seals around the rim of the lid. Brands like Tupperware, Rubbermaid, or Lock & Lock are excellent choices. The snap-on lids create a secure barrier.
- Glass Jars with Screw-Top Lids: Mason jars or other glass jars with metal lids that screw on tightly can also work well. Ensure the lid has a good seal. These are a great eco-friendly option.
- Reusable Silicone Bags: High-quality, food-grade silicone bags, especially those designed for food storage with a zipper or sealing mechanism, can be a flexible and space-saving option. Make sure they seal very tightly.
- Original Playdough Containers: If you have a very successful batch and want to store it similarly to how it came, consider reusing good-quality plastic containers that previously held store-bought playdough, provided they still seal effectively.
What to Avoid in Playdough Containers
- Loose Plastic Bags: Sandwich bags or thin plastic bags that don’t have a strong zip-lock or seal are not ideal. They allow too much air exchange and are prone to tearing.
- Unsealed Tubs: Any plastic tub or container whose lid doesn’t fit snugly or create a seal will not offer adequate protection.
- Cardboard Boxes: These offer no protection against air or moisture and can even absorb moisture, leading to dough degradation.
Storing Homemade Playdough: Step-by-Step
The process of storing your homemade playdough should be done when the dough is completely cooled if it was heated during preparation.
Step 1: Ensure Complete Cooling
If your playdough recipe involved any heating (like cooking on the stovetop), allow it to cool down to room temperature. Storing warm playdough in an airtight container can create condensation, which is the enemy of long-lasting dough and can encourage mold growth.
Step 2: Knead and Shape
Before placing the playdough into its storage container, give it a final gentle knead. This helps to ensure its consistency is uniform. You can shape it into a disc or a log – whatever makes it fit best into your chosen container. This also helps to redistribute any oils or moisture evenly.
Step 3: Place in the Airtight Container
Carefully place the shaped playdough into your chosen airtight container. Try to press out as much air as possible from the container before sealing the lid. If you have multiple colors, store each color in its own separate container. Mixing colors in a single container will result in a muddy brown or gray over time, even with good storage.
Step 4: Label Your Containers
This is a simple but helpful step, especially if you make different batches or have various colors. Label each container with the color and perhaps the date it was made. This allows you to easily identify your playdough and use the older batches first.
Where to Store Your Playdough for Maximum Freshness
The location where you store your playdough plays a crucial role in its shelf life. The primary goal is to keep it away from fluctuating temperatures and direct sunlight.
Ideal Storage Locations
- Cool, Dry Cupboard or Pantry: This is generally the best place. A cupboard or pantry offers a stable environment, protected from direct sunlight and extreme temperature changes. This is key for playdough preservation.
- Refrigerator (for certain recipes): Some homemade playdough recipes, particularly those that might be more prone to spoilage due to their ingredients (like some natural preservative-free versions), can benefit from refrigeration. However, condensation can be an issue when bringing it out. If you refrigerate your playdough, allow it to come to room temperature gradually before opening the container to minimize condensation.
- Kid-Friendly Accessibility: While it’s important to store it well, consider making it accessible to children in a designated play area. However, this means the container might be opened and closed frequently, which can reduce its lifespan compared to a more secluded storage spot.
Locations to Avoid
- Direct Sunlight: Sunlight can heat the playdough and cause the ingredients to degrade or separate, affecting its texture and color.
- Near Heat Sources: Avoid storing playdough near radiators, ovens, stoves, or sunny windows. Heat accelerates the drying process and can also lead to spoilage.
- Humid Areas: Bathrooms or basements prone to dampness can encourage mold growth.
Extending the Playdough Shelf Life: Homemade Playdough Tips
Beyond just using an airtight container, a few extra homemade playdough tips can significantly boost its longevity.
The Role of Ingredients
The ingredients in your playdough recipe influence its shelf life.
- Salt: Salt acts as a natural preservative. Many recipes include a good amount of salt, which helps to draw out moisture from the dough and inhibit bacterial growth.
- Cream of Tartar: This acidic ingredient also contributes to the dough’s texture and can help with preservation.
- Natural vs. Artificial Preservatives: Recipes that rely solely on salt and perhaps a bit of vegetable oil will generally have a good shelf life. If you are concerned about longevity and not using any artificial preservatives, focus on recipes with a higher salt content.
Refreshing Stale Playdough
Don’t despair if your homemade playdough starts to feel a little dry! You can often revive it.
- Add a Few Drops of Water or Oil: If the playdough is a bit stiff and crumbly, try adding a tiny amount of water or a neutral oil (like vegetable or coconut oil). Knead it thoroughly. Start with just a drop or two, as too much can make it sticky.
- Warm It Gently: Sometimes, gently kneading the playdough in your hands for a few minutes can warm it up and make it more pliable. The warmth of your hands helps to reincorporate the moisture.
Batch Size and Frequency
Consider making smaller batches more frequently if you find your playdough tends to go bad before you can use it all. This way, you’re always working with fresh dough and minimizing waste.
Playdough Making and Storing: A Practical Approach
The best way to store playdough is an ongoing practice. It’s about consistency in your methods.
- Clean Hands: Always ensure hands are clean before playing with or storing playdough. This prevents the introduction of dirt and germs that can lead to spoilage.
- Separate Colors: As mentioned, keep colors separate to maintain their vibrancy and prevent them from blending into unappealing shades.
- Regular Checks: Periodically check your stored playdough for any signs of dryness, stickiness, or mold. If you notice any issues, it’s best to discard that batch and make a fresh one.
What is the Playdough Shelf Life?
The playdough shelf life for homemade versions can vary. With optimal homemade playdough storage, you can expect it to last anywhere from 3 months to a year. This range depends heavily on the recipe used, the ingredients, the humidity of your storage environment, and how well it’s sealed.
- Recipes with more salt and cream of tartar tend to last longer.
- Recipes that are less dense or have more water content might have a shorter shelf life.
- If your playdough develops an off smell or visible mold, it should be discarded immediately.
Troubleshooting Common Storage Issues
Even with the best intentions, you might encounter some common problems.
My Playdough is Too Hard!
This is the most frequent issue and is usually due to air exposure.
- Remedy: Try the refreshing method of adding a few drops of water or oil and kneading vigorously. Sometimes, a warm, damp cloth wrapped around the dough for a few minutes can help reintroduce moisture, but be careful not to make it too wet.
My Playdough is Sticky!
This can happen if the dough was slightly too wet to begin with, or if it absorbed moisture from the air (less common with airtight containers).
- Remedy: Sprinkle a tiny amount of flour or cornstarch onto your work surface and knead it into the dough. Work in very small increments to avoid making it too dry.
My Playdough Has Mold!
This is a sign of spoilage and means the dough is no longer safe to play with.
- Remedy: Discard the moldy playdough immediately. Wash the storage container thoroughly before reusing it. This issue is usually caused by insufficient salt in the recipe, inadequate storage, or contamination.
Table: Playdough Storage Comparison
| Storage Method | Airtight Container Type | Pros | Cons | Playdough Shelf Life Estimate (with good practice) |
|---|---|---|---|---|
| Ideal Storage | Plastic food container with latching lid; Glass jar with screw-top lid | Excellent seal, prevents drying, protects from contaminants. | Can be bulky; requires purchasing specific containers. | 6 months – 1 year |
| Good Storage | Reusable silicone bag (high quality, tight seal) | Flexible, space-saving, good seal. | Can be punctured; ensure the seal is truly airtight. | 4 months – 9 months |
| Less Ideal (Temporary) | Original playdough container (if seal is still good) | Convenient if still functional. | Seal may degrade over time, less durable than dedicated food containers. | 3 months – 6 months |
| Not Recommended | Sandwich bags, unsealed tubs, cardboard boxes | Low cost (initially). | Poor seal, allows air in, dries out dough quickly, can tear. | Weeks, or even days |
Frequently Asked Questions (FAQ)
Here are answers to some common questions about storing homemade playdough.
Can I store homemade playdough in the refrigerator?
Yes, you can, and it can extend its shelf life, especially for recipes without robust preservatives. However, it’s crucial to allow the playdough to come to room temperature gradually before opening the container. This prevents condensation from forming, which can make the dough sticky or lead to mold. Place the sealed container on the counter for an hour or so before opening.
How do I know if my homemade playdough has gone bad?
You’ll know your playdough has gone bad if it develops a sour or unpleasant smell, has visible mold spots (any color), or if it becomes extremely dry and crumbly, resisting all attempts at revival. If any of these signs are present, it’s best to discard it for safety reasons.
Does the type of oil used in homemade playdough affect storage?
While the type of oil (like vegetable, coconut, or baby oil) primarily affects the dough’s initial texture and feel, it doesn’t drastically change its fundamental storage needs. However, some oils are more prone to rancidity over very long periods in warm conditions. Using neutral oils is generally best for overall stability.
What if my playdough starts to harden even in its container?
This indicates the seal on your container isn’t as airtight as you thought, or it’s being stored in a very dry environment. Try the revival method of adding a few drops of water or oil. If it continues to harden quickly, you might need to invest in better quality airtight containers.
How long can I expect homemade playdough to last?
With proper homemade playdough storage, you can typically expect your playdough to last anywhere from 3 months to a year. The exact playdough shelf life depends on the recipe, ingredients, and storage conditions. Following these homemade playdough tips will help maximize its usability.
Should I store different colors of playdough together?
No, it’s always best to store different colors of playdough separately. This prevents them from mixing and creating undesirable muddy colors. Each color should be in its own well-sealed container.
Can I freeze homemade playdough?
Freezing homemade playdough is generally not recommended. The thawing process can cause ice crystals to form, which can alter the texture of the dough, making it gummy or sticky, and difficult to salvage. It’s better to store it in the refrigerator if you need a longer-term solution than room temperature.
By following these comprehensive guidelines for homemade playdough storage, you can ensure your homemade creations remain a source of joy and creativity for a long time. Proper playdough preservation is key to enjoying the fruits of your playdough making and storing efforts.